
The Emotional Magic of a Perfect Dessert
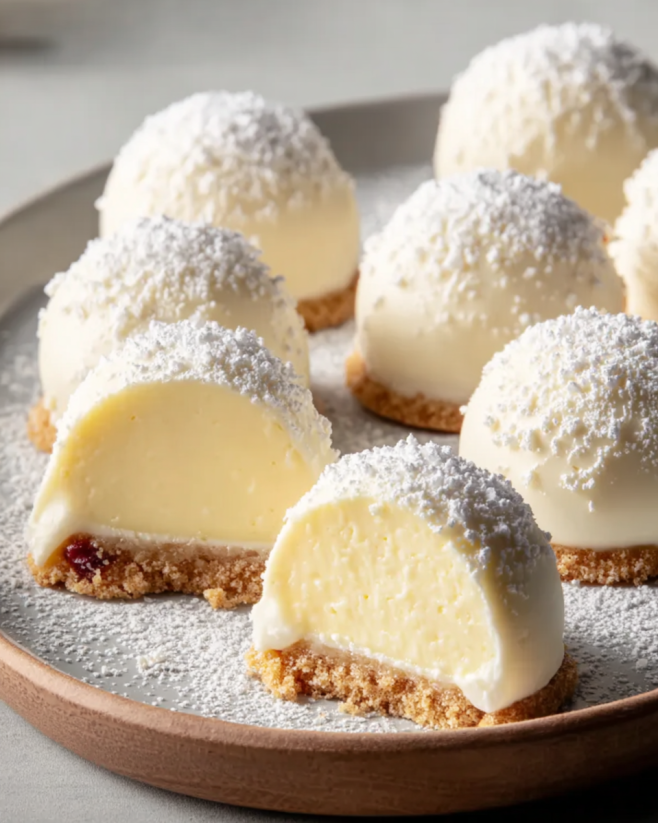
Imagine walking into a room filled with the warm, sweet scent of vanilla and toasted graham crackers. You see a platter of perfectly cut, golden-edged squares sitting on the table. They look like tiny works of art, topped with a single fresh berry or a simple swirl of cream. You take one, and as it melts in your mouth, all the stress of your day seems to vanish. That first bite is a perfect balance of a crunchy, buttery base and a velvet-smooth, tangy filling.
This isn’t just a snack; it is a memory in the making. Whether it was a birthday party where you stayed up late laughing with friends or a quiet holiday dinner with family, dessert is the language of celebration. We often think that making something this beautiful requires professional chef skills, but that is a myth. You can create this magic in your own kitchen. This Cheesecake Bites Recipe is designed to give you that “wow” factor without the “how” frustration. Let’s embark on this sweet journey together and turn your kitchen into the best bakery in town.
Why You Will Love This Cheesecake Bites Recipe
There is something inherently charming about miniature food. When you serve a giant slice of cake, it feels like a commitment. But a cheesecake bite? That feels like an invitation. These small squares are the ultimate party food because they allow your guests to indulge without needing a plate and fork. You can hold a conversation in one hand and a delicious treat in the other.
Furthermore, this Cheesecake Bites Recipe solves the biggest problem with traditional cheesecakes: the dreaded “crack” on top and the long cooling times. Because these are smaller and thinner, they bake more evenly and cool much faster. You get all the luxury of a New York-style cheesecake in a fraction of the time. They are portable, shareable, and undeniably cute. They fit perfectly into lunchboxes, picnic baskets, or tiered dessert stands for a fancy tea party.
Essential Ingredients for Success
Before you turn on your oven, you need to understand that a recipe is only as good as what you put into it. Since this recipe has a short list of ingredients, each one has a big job to do. You want to choose the best cream cheese available—always go for the full-fat bricks, not the spreadable kind in a tub. The fat content is what creates that iconic creamy texture that everyone loves.
Your eggs should be fresh, and your vanilla extract should ideally be pure rather than imitation. These small choices make a massive difference in the final flavor. When you use high-quality ingredients, you aren’t just baking; you are crafting an experience. Your friends and family will notice the richness and the depth of flavor that sets your homemade treats apart from store-bought versions.
Choosing the Right Cream Cheese
The star of the show is, without a doubt, the cream cheese. For the best results, you should use a high-quality brand like Philadelphia Cream Cheese. The reason pros insist on full-fat block cheese is the stability. Low-fat versions or tub versions contain more water and air. When baked, these can cause your bites to collapse or become grainy.
You also want to make sure the cheese is at room temperature. This is the single most important tip for any Cheesecake Bites Recipe. If the cheese is cold, it won’t blend smoothly with the sugar. You will end up with tiny white lumps that stay in the batter even after baking. To avoid this, take your ingredients out of the fridge at least two hours before you start.
The Role of the Graham Cracker Crust
A great cheesecake needs a solid foundation. The crust provides a textural contrast to the soft filling. While some people use pre-made crumbs, crushing your own graham crackers allows you to control the texture. You want a mix of fine dust and tiny sandy pieces. This creates a crust that is sturdy enough to hold but delicate enough to melt in your mouth.
The addition of a little sugar and melted butter turns those dry crumbs into a delicious, toasted base. The butter acts as the glue. Without enough butter, the crust will simply fall apart when you try to lift the squares out of the pan. We want a crust that “snaps” slightly when you bite into it, providing that classic salty-sweet balance that makes cheesecake so addictive.
The Full Ingredient List Table
To make these stunning squares, you will need to organize your ingredients into two parts: the crust and the creamy filling. Having everything measured out before you start is a secret tip that professional bakers call “mise en place.”
| Component | Ingredient | Quantity | Purpose |
|---|---|---|---|
| The Crust | Graham Cracker Crumbs | 1.5 Cups | Provides the crunchy base |
| The Crust | Unsalted Butter (Melted) | 5 Tablespoons | Binds the crumbs together |
| The Crust | Granulated Sugar | 2 Tablespoons | Adds a hint of sweetness to the base |
| The Filling | Cream Cheese (Softened) | 16 oz (2 Bricks) | Creates the rich, creamy center |
| The Filling | Granulated Sugar | 2/3 Cup | Sweetens the cheesecake filling |
| The Filling | Large Eggs (Room Temp) | 2 Eggs | Provides structure and lift |
| The Filling | Sour Cream | 1/4 Cup | Adds tang and smoothness |
| The Filling | Pure Vanilla Extract | 1 Teaspoon | Enhances the overall flavor |
| The Filling | Fresh Lemon Juice | 1/2 Teaspoon | Brightens the richness |
Step-by-Step Preparation Guide
Now that you have your ingredients ready, it is time to build your masterpiece. This process is divided into clear stages to ensure you don’t feel overwhelmed. Remember, baking is a science, but it is also an art. Take your time and enjoy the process of creating something from scratch.
Step 1: Mastering the Buttery Base
Start by preheating your oven to 325°F (163°C). Line an 8×8 inch square baking pan with parchment paper, leaving an inch of overhang on the sides. This overhang acts as a “handle” so you can lift the bites out later without breaking them.
In a medium bowl, stir together the graham cracker crumbs, sugar, and melted butter. The mixture should look like wet sand. Pour it into your prepared pan and press it down as hard as you can. A pro tip is to use the bottom of a flat measuring cup or a heavy glass to pack it in. Bake the crust for 8 to 10 minutes until it smells fragrant and looks slightly golden. Set it aside to cool while you make the filling.
Step 2: Creating a Silky Smooth Filling
In a large mixing bowl, beat your softened cream cheese and sugar together. Use an electric hand mixer on medium speed. You want to beat it until it is completely smooth and looks like frosting. This usually takes about 2 minutes.
Add the sour cream, vanilla, and lemon juice. Mix again until combined. Now, the most important part: the eggs. Add the eggs one at a time, mixing on the lowest speed possible. You only want to mix until the yellow yolk is just gone. If you whip too much air into the eggs, your cheesecake will puff up and then crack. A dense, creamy bite is the goal!
Step 3: The Baking Process
Pour the creamy filling over your cooled crust. Use a spatula to smooth the top so it is perfectly flat. Tap the pan gently on the counter a few times to help any trapped air bubbles rise to the surface and pop. This ensures your bites don’t have holes in them when you cut them.
Place the pan in the center of the oven. Bake for 30 to 35 minutes. You are looking for the “jiggle test.” The edges should be set and look slightly dry, but the very center should still wiggle just a little bit like Jell-O when you give the pan a tiny shake. Don’t worry—it will firm up as it cools!
The Importance of the Cooling Phase
This is the hardest part of the Cheesecake Bites Recipe: waiting. If you try to eat these right out of the oven, they will taste like sweet scrambled eggs. Cheesecake needs time for the proteins to settle and the flavors to develop.
Let the pan sit on your counter until it is no longer hot to the touch. Then, cover it with plastic wrap and put it in the fridge for at least 4 hours. Ideally, you should leave it overnight. This long chill time is what creates that velvet-like texture that makes people go back for seconds and thirds.
How to Get Those Perfect, Sharp Edges
If you want your squares to look like the ones in the photos, the way you cut them matters. Once the cheesecake is fully chilled, use the parchment paper handles to lift the whole block out of the pan and onto a cutting board.
Use a long, sharp knife. Before the first cut, dip the knife in a tall glass of hot water and wipe it dry with a clean towel. Make your cut, then repeat the “dip and wipe” process for every single slice. This prevents the creamy filling from sticking to the blade and dragging through the next bite. It takes a little extra time, but the professional look is worth it.
Nutritional Information Table
While we eat dessert for the flavor, it is always helpful to know the nutritional facts. This allows you to fit these treats into your daily goals. One of the benefits of this Cheesecake Bites Recipe is that the portions are naturally controlled.
| Nutrients | Amount Per Serving (1 Square) | Daily Value % |
|---|---|---|
| Calories | 155 kcal | 8% |
| Total Fat | 11g | 14% |
| Saturated Fat | 7g | 35% |
| Cholesterol | 50mg | 17% |
| Sodium | 130mg | 6% |
| Total Carbohydrates | 13g | 5% |
| Dietary Fiber | 0.5g | 2% |
| Sugars | 10g | – |
| Protein | 3g | 6% |
Creative Variations to Try at Home
Once you have mastered the basic recipe, you can start to get creative. The ivory top of the cheesecake is like a blank canvas. If your original blog image shows fruit, you can easily add that here.
- Fruit Swirl: Before baking, drop small spoons of strawberry or raspberry jam on top and use a toothpick to swirl it into patterns.
- Chocolate Chip: Fold half a cup of mini chocolate chips into the batter before pouring it over the crust.
- Turtle Bites: Top the finished, chilled squares with a drizzle of caramel, melted chocolate, and a few chopped pecans.
- Oreo Base: Instead of graham crackers, use crushed Oreo cookies for a dark, chocolatey crust that looks striking against the white filling.
Storage and Freezing Tips
These bites are a dream for anyone who likes to prep ahead. You can make them up to three days before you need them, and they will stay perfectly fresh in the refrigerator. Just make sure they are in an airtight container so they don’t absorb the flavors of other foods in your fridge.
Did you know you can also freeze them? If you have leftovers, wrap the individual squares in plastic wrap and place them in a freezer bag. They will last for up to 2 months. When you are ready for a snack, just take one out and let it thaw on the counter for 20 minutes. It’s like having a gourmet bakery hidden in your freezer!
Common Troubleshooting Tips for Bakers
Sometimes, things don’t go exactly as planned. If your crust is too crumbly, it usually means you didn’t press it down hard enough or you needed a tiny bit more butter. Next time, try adding an extra half-tablespoon of butter to the crumbs.
If your cheesecake has a large crack across the top, don’t panic! This usually happens if the oven was too hot or if you over-mixed the batter. The good news is that a crack doesn’t change the flavor at all. You can easily hide it with a dollop of whipped cream or a fresh slice of fruit. No one will ever know!
Frequently Asked Questions (FAQs)
1. Can I use a different size pan for this recipe? We recommend an 8×8 inch pan for the best thickness. If you use a 9×9 inch pan, the bites will be much thinner and will bake faster (check them at 25 minutes). We don’t recommend using a round cake pan unless you want wedge-shaped pieces.
2. Why do my ingredients need to be at room temperature? Room temperature ingredients emulsify better. When the cream cheese is soft, it can trap the sugar and air properly, leading to a smooth finish. Cold cheese stays in clumps, no matter how long you mix it.
3. Is the lemon juice necessary? The lemon juice doesn’t make the cheesecake taste like lemon. Instead, it acts as a “flavor booster.” The acid cuts through the heavy fat of the cream cheese and makes the whole dessert feel lighter and fresher.
4. How do I know for sure when they are done baking? Use the “jiggle test.” Tap the side of the pan with a wooden spoon. The edges should stay still, but the center 2 inches should move slightly like set pudding. If the whole thing waves like water, it needs more time.
5. Can I make this recipe gluten-free? Yes! Simply replace the graham crackers with your favorite gluten-free graham cracker brand. Most gluten-free crackers behave exactly like the regular ones when mixed with butter and sugar.
6. Do I need to use a water bath? For this specific Cheesecake Bites Recipe, a water bath is not necessary. Because the layer of cheesecake is relatively thin compared to a whole cake, it cooks quickly and evenly without the extra steam.
Final Thoughts and Your Next Step
Baking is more than just following a list of steps; it is an act of love. When you put in the time to soften the ingredients, press the crust, and wait patiently for the chill, you are creating something that will bring a smile to someone’s face. You now have the knowledge to create a dessert that matches the beautiful imagery on your blog perfectly.
Whether you are making these for a big party or just a sweet treat for your family, the result will be the same: pure, creamy bliss. Don’t be afraid to experiment with toppings and flavors as you get more comfortable. The most important thing is to have fun in the kitchen and enjoy the delicious rewards of your hard work.
Ready to become the star of your next party? Start your baking journey today and see how easy it is to make these professional-grade treats at home!
Cheesecake Bites Recipe
Ingredients
Equipment
Method
- Preheat your oven to 325°F (163°C) and line an 8×8 inch baking pan with parchment paper.
- In a medium bowl, combine graham cracker crumbs, 2 tablespoons sugar, and melted butter until it resembles wet sand.
- Press the crust mixture firmly into the bottom of the pan using the bottom of a flat measuring cup.
- Bake the crust for 8-10 minutes until golden and fragrant, then set aside to cool.
- Beat the softened cream cheese and 2/3 cup sugar in a large bowl with an electric mixer for 2 minutes until smooth.
- Mix in the sour cream, vanilla extract, and lemon juice until fully incorporated.
- Add eggs one at a time, mixing on low speed just until each yolk is combined.
- Pour the batter over the crust, smooth the top, and tap the pan on the counter to remove air bubbles.
- Bake for 30-35 minutes until the edges are set and the center jiggles slightly.
- Allow to cool at room temperature, then refrigerate for at least 4 hours or overnight.
- Lift the cheesecake from the pan and cut into squares with a hot, dry knife for clean edges.