
Introduction to Peanut Butter Chocolate No-Bake Bars Recipe
If you’re looking for a quick and delicious treat, look no further! The Peanut Butter Chocolate No-Bake Bars Recipe is a delightful combination of flavors and textures. These bars are not only easy to make but also require no baking, making them perfect for any occasion. Whether you need a sweet snack for a party or a quick energy boost during the day, these bars have got you covered.
What Makes Peanut Butter Chocolate No-Bake Bars Special?
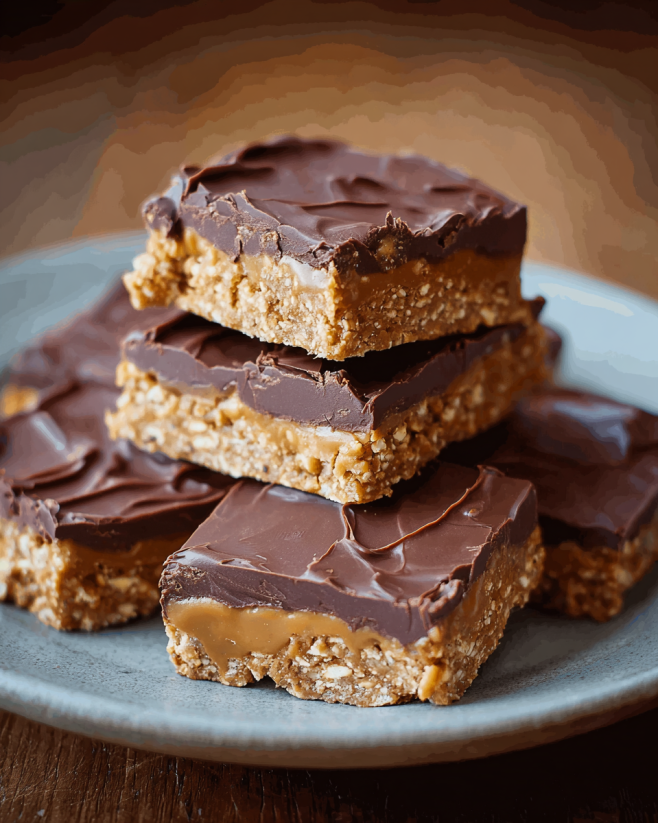
What sets these bars apart is their rich, creamy peanut butter flavor paired with the sweetness of honey and the indulgence of chocolate. They are packed with rolled oats, providing a hearty texture that keeps you satisfied. Plus, they are incredibly versatile! You can customize them with your favorite mix-ins or toppings, making each batch unique.
Another fantastic aspect of this recipe is its simplicity. With just a few ingredients and minimal preparation time, you can whip up a batch in no time. This makes it an excellent choice for busy individuals or families looking for a quick dessert option. The no-bake aspect means you can enjoy these bars without heating up your kitchen, which is especially nice during hot summer months.
In addition to being delicious, these bars are also nutritious. They offer a good balance of protein, healthy fats, and carbohydrates, making them a great snack for kids and adults alike. So, whether you’re fueling up for a workout or satisfying a sweet tooth, these Peanut Butter Chocolate No-Bake Bars are sure to please!
Ingredients for Peanut Butter Chocolate No-Bake Bars Recipe
To create your own batch of Peanut Butter Chocolate No-Bake Bars, you’ll need a handful of simple ingredients. Each one plays a vital role in delivering that delicious flavor and satisfying texture. Here’s what you’ll need:
- 1 cup creamy peanut butter: This is the star of the show! It adds creaminess and a rich peanut flavor.
- 1 cup honey: Honey acts as a natural sweetener and helps bind the ingredients together.
- 2 cups rolled oats: Rolled oats provide a hearty base and add fiber to the bars.
- 1 cup chocolate chips: These add a sweet, melty chocolate layer on top, making the bars irresistible.
- 1 teaspoon vanilla extract: A splash of vanilla enhances the overall flavor profile.
- 1/4 teaspoon salt: A pinch of salt balances the sweetness and brings out the flavors.
These ingredients are not only easy to find but also come together to create a delightful treat. Feel free to experiment with different types of nut butters or sweeteners to suit your taste. The beauty of this recipe lies in its flexibility, allowing you to make it your own!
Step-by-Step Preparation of Peanut Butter Chocolate No-Bake Bars Recipe
Now that you have all your ingredients ready, it’s time to dive into the fun part—preparing your Peanut Butter Chocolate No-Bake Bars! Follow these simple steps to create a delicious treat that everyone will love.
Step 1: Gather Your Ingredients
Before you start cooking, make sure you have everything you need. Gather your creamy peanut butter, honey, rolled oats, chocolate chips, vanilla extract, and salt. Having all your ingredients in one place will make the process smoother and more enjoyable. Plus, it’s always nice to see everything laid out!
Step 2: Prepare the Base Mixture
In a medium saucepan, combine the creamy peanut butter and honey. Place the saucepan over low heat. Stir the mixture gently until it melts and blends together, which should take about 2-3 minutes. This step is crucial as it creates a smooth base for your bars. Once melted, remove the saucepan from heat and stir in the vanilla extract and salt. This will enhance the flavor and balance the sweetness.
Step 3: Press the Mixture into the Pan
Next, take a large mixing bowl and add the rolled oats. Pour the warm peanut butter mixture over the oats. Mix everything together until the oats are fully coated. This is where the magic happens! Once combined, line an 8×8-inch baking dish with parchment paper. Make sure to leave some overhang for easy removal later. Pour the oat mixture into the prepared dish and press it down firmly with a spatula or your hands. This step ensures that your bars hold together nicely.
Step 4: Make the Chocolate Topping
Now, it’s time to add the delicious chocolate topping! In a microwave-safe bowl, place the chocolate chips. Melt them in the microwave in 30-second intervals, stirring in between until smooth. Be careful not to overheat the chocolate. Once melted, pour the chocolate over the pressed oat mixture. Use a spatula to spread it evenly across the top. This layer of chocolate adds a rich, sweet finish to your bars.
Step 5: Chill and Set the Bars
Finally, it’s time to let your bars set. Place the baking dish in the refrigerator for at least 2 hours. This will allow the bars to firm up nicely. Once they are set, lift them out of the dish using the parchment paper overhang. Cut them into squares, and your Peanut Butter Chocolate No-Bake Bars are ready to enjoy!
These steps are simple and straightforward, making it easy for anyone to whip up a batch of these tasty treats. Enjoy the process and the delicious results!
Variations of Peanut Butter Chocolate No-Bake Bars Recipe
While the classic Peanut Butter Chocolate No-Bake Bars are already a hit, there’s always room for creativity in the kitchen! You can easily customize this recipe to suit your taste or dietary preferences. Here are some fun variations to consider:
Adding Different Nut Butters
If you want to switch things up, try using different nut butters! Almond butter, cashew butter, or even sunflower seed butter can be great alternatives. Each nut butter brings its unique flavor and texture to the bars. For instance, almond butter adds a slightly sweet and nutty taste, while sunflower seed butter is perfect for those with nut allergies. Just make sure to use the same amount as the peanut butter in the original recipe for the best results.
Incorporating Additional Mix-Ins
Another way to make your Peanut Butter Chocolate No-Bake Bars even more exciting is by adding mix-ins. Consider tossing in some chopped nuts, seeds, or dried fruits. For a crunchy texture, add 1/2 cup of chopped almonds or walnuts to the oat mixture. If you prefer a fruity twist, try adding dried cranberries or raisins. You can also sprinkle in some mini marshmallows or coconut flakes for added flavor and fun! The possibilities are endless, so feel free to experiment and find your favorite combination.
These variations not only enhance the taste but also allow you to tailor the bars to your liking. Whether you’re in the mood for something nutty or fruity, these adjustments will keep your no-bake bars fresh and exciting!
Cooking Note for Peanut Butter Chocolate No-Bake Bars Recipe
When making your Peanut Butter Chocolate No-Bake Bars, there are a few important cooking notes to keep in mind. These tips will help ensure that your bars turn out perfectly every time!
First, always use creamy peanut butter for the best texture. While crunchy peanut butter can add a fun twist, it may affect how well the bars hold together. Creamy peanut butter blends smoothly with the honey, creating a cohesive mixture that binds the oats effectively.
Next, be mindful of the heat when melting the peanut butter and honey. Using low heat is crucial to prevent burning. Stirring continuously will help achieve a smooth consistency without any lumps. If you notice any separation, simply stir a bit longer until it comes together.
Additionally, when pressing the oat mixture into the baking dish, make sure to pack it down firmly. This step is essential for creating bars that won’t crumble when you cut them. Use a spatula or your hands to press down evenly, ensuring that the mixture is compact.
Lastly, patience is key when it comes to chilling the bars. Allowing them to set in the refrigerator for at least 2 hours will help them firm up properly. If you’re in a hurry, you can place them in the freezer for about 30 minutes, but be cautious not to freeze them for too long, as this can make them too hard to cut.
By following these cooking notes, you’ll be well on your way to creating delicious Peanut Butter Chocolate No-Bake Bars that everyone will love. Enjoy the process and the delightful results!
Serving Suggestions for Peanut Butter Chocolate No-Bake Bars Recipe
Once your Peanut Butter Chocolate No-Bake Bars are ready, it’s time to think about how to serve them! These bars are not only delicious but also versatile, making them perfect for various occasions. Here are some serving suggestions to elevate your treat:
- As a Snack: Enjoy these bars as a quick snack during the day. They are perfect for a mid-afternoon energy boost or a post-workout treat. Just grab a square and go!
- With Fresh Fruit: Pair your bars with fresh fruit like banana slices, strawberries, or apple wedges. The combination of flavors and textures will make for a delightful snack.
- On a Dessert Platter: Cut the bars into smaller squares and arrange them on a dessert platter. This makes for a beautiful presentation at parties or gatherings. You can even add some whipped cream or yogurt on the side for dipping!
- With a Hot Beverage: Serve your bars alongside a warm cup of coffee, tea, or hot chocolate. The rich flavors of the bars complement the warmth of the drink, creating a cozy experience.
- As a Lunchbox Treat: Pack these bars in lunchboxes for kids and adults alike. They make a great addition to any lunch, providing a sweet yet nutritious option that everyone will enjoy.
These serving suggestions not only enhance the enjoyment of your Peanut Butter Chocolate No-Bake Bars but also allow you to get creative with how you present and enjoy them. Whether you’re sharing with friends or savoring them solo, these bars are sure to be a hit!
Tips for Perfecting Your Peanut Butter Chocolate No-Bake Bars Recipe
Creating the perfect Peanut Butter Chocolate No-Bake Bars is all about attention to detail. With a few helpful tips, you can elevate your bars to a whole new level of deliciousness. Here are some essential tips to keep in mind:
- Choose Quality Ingredients: The flavor of your bars greatly depends on the quality of the ingredients. Opt for natural peanut butter without added sugars or oils. This will enhance the taste and texture of your bars.
- Measure Accurately: Precision is key in baking, even for no-bake recipes. Use measuring cups and spoons to ensure you have the right amounts of each ingredient. This will help maintain the balance of flavors and textures.
- Mix Thoroughly: When combining the peanut butter mixture with the oats, make sure to mix thoroughly. This ensures that every oat is coated, leading to a more cohesive bar that holds together well.
- Press Firmly: When pressing the mixture into the baking dish, don’t be shy! Use your hands or a spatula to press down firmly. This step is crucial for preventing the bars from crumbling when cut.
- Experiment with Sweetness: If you prefer a less sweet bar, feel free to adjust the amount of honey. You can start with 3/4 cup and taste the mixture before adding more. This way, you can customize the sweetness to your liking.
- Let Them Chill: Patience pays off! Allow the bars to chill for the full 2 hours. This helps them set properly, making them easier to cut and enjoy. If you’re in a hurry, a quick 30-minute chill in the freezer can work, but be cautious not to freeze them too long.
- Store Properly: To keep your bars fresh, store them in an airtight container in the refrigerator. They can last up to a week, making them a great make-ahead snack!
By following these tips, you’ll be well on your way to mastering the art of making Peanut Butter Chocolate No-Bake Bars. Enjoy the process, and don’t hesitate to share your delicious creations with family and friends!
Breakdown of Time for Peanut Butter Chocolate No-Bake Bars Recipe
Understanding the time needed for each step of the Peanut Butter Chocolate No-Bake Bars Recipe can help you plan better. Here’s a quick breakdown of the time involved in making these delicious treats:
Prep Time
The prep time for this recipe is quite short. You’ll need about 10-15 minutes to gather your ingredients and prepare the base mixture. This includes measuring out the peanut butter, honey, oats, and other ingredients. It’s a simple process that won’t take much of your time!
Cooking Time
Since this is a no-bake recipe, the cooking time is minimal. You’ll spend around 5-10 minutes melting the peanut butter and honey together. After that, it’s just a matter of mixing and pressing the ingredients into the pan. The real time commitment comes from chilling the bars.
Total Time
In total, you can expect to spend about 2 hours and 15 minutes from start to finish. This includes the prep time, cooking time, and the necessary chilling time for the bars to set properly. While the active time is short, the wait is worth it for those delicious Peanut Butter Chocolate No-Bake Bars!
Nutritional Information for Peanut Butter Chocolate No-Bake Bars Recipe
Understanding the nutritional content of your Peanut Butter Chocolate No-Bake Bars is essential, especially if you’re mindful of your diet. These bars not only satisfy your sweet cravings but also provide a good balance of nutrients. Here’s a breakdown of the key nutritional information per serving:
Calories
Each serving of these delightful bars contains approximately 180 calories. This makes them a great option for a quick snack or a post-workout treat. The combination of peanut butter and honey provides a good source of energy, perfect for keeping you fueled throughout the day.
Protein
In terms of protein, each bar offers about 5 grams. This protein content comes primarily from the creamy peanut butter and rolled oats. Protein is essential for muscle repair and growth, making these bars a smart choice for anyone looking to maintain a healthy lifestyle.
Sodium
When it comes to sodium, each serving contains roughly 50 milligrams. This is a relatively low amount, especially considering that the bars are made with natural ingredients. Keeping sodium levels in check is important for overall health, and these bars fit well within a balanced diet.
Overall, the Peanut Butter Chocolate No-Bake Bars are not only delicious but also provide a nutritious option for snacking. With a good mix of calories, protein, and low sodium, they can be enjoyed guilt-free. Whether you’re looking for a quick energy boost or a sweet treat, these bars are a fantastic choice!
FAQs about Peanut Butter Chocolate No-Bake Bars Recipe
Can I use natural peanut butter for this recipe?
Absolutely! You can use natural peanut butter for your Peanut Butter Chocolate No-Bake Bars. Just keep in mind that natural peanut butter may have a different consistency compared to creamy peanut butter. It can be a bit more oily, so make sure to stir it well before measuring. This will help ensure that your bars hold together nicely. The flavor will still be delicious, giving you that rich peanut taste you love!
How long do the bars last in the fridge?
Your Peanut Butter Chocolate No-Bake Bars can last up to a week in the fridge when stored properly. To keep them fresh, place the bars in an airtight container. This will help prevent them from drying out or absorbing any odors from the fridge. If you find that you have leftovers, they make a great snack for the next few days!
Can I freeze Peanut Butter Chocolate No-Bake Bars?
Yes, you can freeze your Peanut Butter Chocolate No-Bake Bars! They freeze very well, making them a convenient option for meal prep. To freeze, wrap the bars tightly in plastic wrap or place them in a freezer-safe container. They can last for up to three months in the freezer. When you’re ready to enjoy them, simply thaw them in the fridge overnight or at room temperature for a few hours. This way, you’ll always have a tasty treat on hand!
Conclusion on Peanut Butter Chocolate No-Bake Bars Recipe
In conclusion, the Peanut Butter Chocolate No-Bake Bars Recipe is a delightful and easy treat that everyone can enjoy. With its simple ingredients and straightforward preparation, this recipe is perfect for both novice cooks and seasoned bakers. The combination of creamy peanut butter, sweet honey, and rich chocolate creates a flavor explosion that is hard to resist.
Not only are these bars delicious, but they also offer a nutritious option for snacking. Packed with protein and healthy fats, they provide a satisfying energy boost without the guilt. Whether you’re looking for a quick snack, a post-workout treat, or a sweet addition to your dessert platter, these bars fit the bill perfectly.
Moreover, the versatility of this recipe allows you to customize it to your liking. From trying different nut butters to adding your favorite mix-ins, the possibilities are endless. This means you can create a unique version of these bars every time you make them, keeping your taste buds excited.
So, gather your ingredients, follow the steps, and whip up a batch of these Peanut Butter Chocolate No-Bake Bars today! You’ll be amazed at how quickly they come together and how delicious they taste. Enjoy sharing them with family and friends, or keep them all to yourself—no judgment here!
Happy baking, or should we say, happy no-baking!
Peanut Butter Chocolate No-Bake Bars
Ingredients
Equipment
Method
- Gather your ingredients: creamy peanut butter, honey, rolled oats, chocolate chips, vanilla extract, and salt.
- In a medium saucepan, combine the creamy peanut butter and honey. Place over low heat and stir until melted and blended, about 3.
- In a large mixing bowl, add the rolled oats. Pour the warm peanut butter mixture over the oats and mix until fully coated. Press the mixture into an 8×8-inch baking dish lined with parchment paper.
- In a microwave-safe bowl, melt the chocolate chips in 30-second intervals, stirring until smooth. Pour the chocolate over the pressed oat mixture and spread evenly.
- Chill the baking dish in the refrigerator for at least 120 to set. Once set, lift out using the parchment paper and cut into squares.