
Introduction to Crispy Fried Olives with Garlic Aioli Recipe
If you’re looking for a delightful snack that’s both crunchy and flavorful, look no further than crispy fried olives with garlic aioli. This dish combines the briny goodness of olives with a crispy coating, making it a perfect appetizer or party treat. The garlic aioli adds a creamy, zesty touch that elevates the dish to a whole new level. Whether you’re hosting a gathering or simply enjoying a quiet evening at home, this recipe is sure to impress.
What Makes Crispy Fried Olives a Perfect Snack?
Crispy fried olives are not just tasty; they are also incredibly versatile. First, they offer a unique flavor profile that appeals to many palates. The saltiness of the olives pairs beautifully with the crunchy texture of the panko breadcrumbs. Additionally, the garlic aioli provides a rich, creamy contrast that enhances every bite.
Moreover, this snack is easy to prepare. With just a few simple ingredients, you can whip up a batch in no time. The frying process creates a satisfying crunch that makes these olives irresistible. Plus, they can be served warm or at room temperature, making them perfect for any occasion.
Finally, crispy fried olives are a great way to introduce new flavors to your guests. They are a fun twist on traditional snacks and can spark interesting conversations. So, whether you’re a fan of olives or trying them for the first time, this recipe is a must-try!
Ingredients for Crispy Fried Olives with Garlic Aioli Recipe
To create the delicious crispy fried olives with garlic aioli, you will need a few key ingredients. Each component plays a vital role in achieving the perfect balance of flavors and textures. Here’s what you’ll need:
For the Crispy Fried Olives
- 1 cup pitted green olives
- 1 cup panko breadcrumbs
- 1/2 cup all-purpose flour
- 2 large eggs
- 1 teaspoon garlic powder
- 1/2 teaspoon salt
- 1/4 teaspoon black pepper
- Vegetable oil (for frying)
For the Garlic Aioli
- 1/2 cup mayonnaise
- 1 clove garlic, minced
- 1 tablespoon lemon juice
- 1/4 teaspoon salt
- 1/4 teaspoon black pepper
These ingredients come together to create a delightful snack that is sure to please everyone. The olives provide a savory base, while the panko breadcrumbs add that satisfying crunch. The garlic aioli, with its creamy texture and zesty flavor, perfectly complements the fried olives. Make sure to gather all these ingredients before you start cooking to ensure a smooth preparation process!
Step-by-Step Preparation of Crispy Fried Olives with Garlic Aioli Recipe
Now that you have all your ingredients ready, it’s time to dive into the step-by-step preparation of crispy fried olives with garlic aioli. This process is straightforward and fun, making it a great activity for both novice and experienced cooks. Let’s get started!
Step 1: Preparing the Olives
First, take your pitted green olives and give them a quick rinse under cold water. This helps remove any excess brine, making them less salty. After rinsing, pat them dry with a paper towel. This step is crucial because excess moisture can make the coating soggy. Once dry, set the olives aside while you prepare the breading mixture.
Step 2: Making the Breading Mixture
In this step, you’ll create a three-part breading station. Start by placing the all-purpose flour in a shallow dish. In another dish, beat the two large eggs until they are well mixed. Finally, in a third dish, combine the panko breadcrumbs with garlic powder, salt, and black pepper. This mixture will give your olives that delicious crunch and flavor. Make sure to mix the breadcrumbs well so that the seasonings are evenly distributed.
Step 3: Preparing the Garlic Aioli
While you’re setting up the breading station, it’s a good idea to prepare the garlic aioli. In a bowl, combine the mayonnaise, minced garlic, lemon juice, salt, and black pepper. Stir everything together until smooth. For the best flavor, cover the bowl and refrigerate the aioli for at least 30 minutes. This allows the garlic to infuse into the mayonnaise, creating a rich and zesty dip.
Step 4: Frying the Olives
Now comes the exciting part—frying the olives! Heat about 2 inches of vegetable oil in a deep skillet over medium heat. To check if the oil is hot enough, drop a small piece of bread into the oil. If it sizzles and bubbles, you’re ready to go. Take each olive and dip it first in the flour, then in the beaten eggs, and finally coat it with the panko mixture. Make sure each olive is well-coated for that perfect crunch.
Carefully place the coated olives in the hot oil, frying them in batches. Fry for about 2-3 minutes or until they turn golden brown. Use a slotted spoon to remove the olives from the oil and let them drain on paper towels. This helps remove any excess oil, keeping them crispy.
Step 5: Serving the Dish
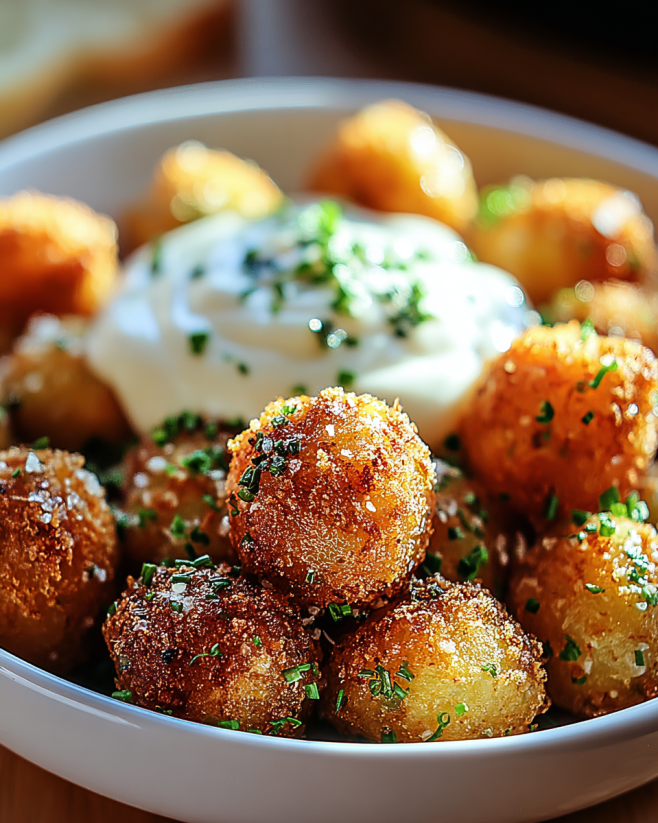
Once all the olives are fried and drained, it’s time to serve! Arrange the crispy fried olives on a serving platter. Don’t forget to bring out the garlic aioli for dipping. This dish is best enjoyed warm, so gather your friends and family around to share this delightful snack. The combination of crunchy olives and creamy aioli is sure to be a hit!
Variations of Crispy Fried Olives with Garlic Aioli Recipe
While the classic crispy fried olives with garlic aioli are delicious on their own, there are many ways to switch things up! Exploring different types of olives and alternative dipping sauces can add exciting flavors to your dish. Let’s dive into some tasty variations!
Different Types of Olives to Use
One of the best parts about this recipe is its versatility. You can experiment with various types of olives to create unique flavor profiles. Here are a few options:
- Kalamata Olives: These dark purple olives have a rich, fruity flavor. They add a bold taste to your dish.
- Castelvetrano Olives: Known for their sweet and mild flavor, these green olives are a favorite among many. They provide a delightful contrast to the crispy coating.
- Gaeta Olives: These small, black olives are soft and slightly sweet. They can add a different texture to your fried olives.
- Mixed Olives: For a fun twist, try using a mix of different olives. This will give your dish a variety of flavors and colors!
Feel free to choose your favorite olives or even combine a few types for a more complex taste. Each variety will bring its own unique character to the dish.
Alternative Dipping Sauces
While garlic aioli is a fantastic dip, you can also try other sauces to complement your crispy fried olives. Here are some delicious alternatives:
- Spicy Marinara: A zesty marinara sauce adds a kick to your olives. The tomato base pairs well with the salty flavor of the olives.
- Ranch Dressing: Creamy ranch dressing is a crowd-pleaser. Its coolness balances the heat from frying.
- Honey Mustard: This sweet and tangy sauce can add a delightful contrast to the savory olives.
- Hummus: For a healthier option, serve your olives with hummus. The creamy texture and nutty flavor make a great pairing.
Feel free to mix and match these sauces to find your perfect combination. Each dip can transform your crispy fried olives into a whole new experience!
Cooking Note for Crispy Fried Olives with Garlic Aioli Recipe
When preparing crispy fried olives with garlic aioli, a few cooking notes can help ensure your dish turns out perfectly every time. These tips will enhance your cooking experience and the final result, making your olives even more delicious!
First, always use fresh ingredients. Fresh olives and high-quality mayonnaise will significantly impact the flavor of your dish. If possible, choose olives that are packed in brine rather than those in oil. This will help maintain their natural taste and texture.
Next, pay attention to the oil temperature. If the oil is too hot, the coating may burn before the olives are heated through. Conversely, if the oil is not hot enough, the olives will absorb too much oil and become greasy. A good rule of thumb is to keep the oil temperature between 350°F to 375°F (175°C to 190°C). Using a thermometer can help you achieve the perfect frying temperature.
Additionally, avoid overcrowding the pan while frying. Frying too many olives at once can lower the oil temperature, leading to uneven cooking. Instead, fry in small batches to ensure each olive gets the attention it deserves. This will help achieve that golden-brown color and crispy texture you’re aiming for.
Lastly, let the fried olives drain on paper towels after frying. This step is crucial for removing excess oil, keeping your olives crispy and light. If you want to keep them warm while frying the rest, place them on a wire rack in a warm oven. This will help maintain their crunchiness until you’re ready to serve.
By following these cooking notes, you’ll be well on your way to creating the perfect crispy fried olives with garlic aioli. Enjoy the process and the delicious results!
Serving Suggestions for Crispy Fried Olives with Garlic Aioli Recipe
When it comes to serving crispy fried olives with garlic aioli, presentation and pairing can elevate your dish to new heights. Here are some delightful serving suggestions to make your snack even more enjoyable!
Garnish for Visual Appeal
Start by garnishing your serving platter. Fresh herbs like parsley or basil can add a pop of color and freshness. You can also sprinkle some lemon zest over the olives for a bright, citrusy aroma. This not only enhances the visual appeal but also complements the flavors of the dish.
Pair with a Charcuterie Board
Crispy fried olives make a fantastic addition to a charcuterie board. Pair them with a variety of cheeses, cured meats, and fresh fruits. The salty olives will balance the richness of the cheeses and the savory flavors of the meats. Consider adding some crackers or breadsticks for a complete snacking experience.
Serve with a Side Salad
For a lighter option, serve your crispy fried olives alongside a fresh salad. A simple mixed greens salad with a light vinaigrette can provide a refreshing contrast to the rich, fried olives. The crunch of the salad will complement the texture of the olives, making for a well-rounded meal.
Perfect for Parties
If you’re hosting a gathering, consider serving the olives in individual cups or small bowls. This makes it easy for guests to grab and enjoy without the need for utensils. You can also set up a dipping station with various sauces, allowing everyone to customize their experience.
Enjoy with Drinks
Crispy fried olives pair wonderfully with a variety of beverages. Serve them with a chilled glass of white wine or a light beer. The refreshing drinks will balance the savory flavors of the olives. For a non-alcoholic option, try sparkling water with a slice of lemon or lime for a zesty touch.
With these serving suggestions, your crispy fried olives with garlic aioli will not only taste amazing but also look inviting and appealing. Enjoy sharing this delightful snack with friends and family!
Tips for Perfecting Your Crispy Fried Olives with Garlic Aioli Recipe
To ensure your crispy fried olives with garlic aioli turn out perfectly every time, consider these helpful tips. Each suggestion will enhance the flavor, texture, and overall experience of this delightful snack.
Choose the Right Olives
Start by selecting high-quality olives. Fresh, pitted green olives are ideal, but don’t hesitate to explore other varieties. Kalamata or Castelvetrano olives can add unique flavors. Always taste the olives before using them to ensure they meet your preference.
Prep Your Ingredients Ahead of Time
Preparation is key! Gather all your ingredients and tools before you start cooking. This will make the process smoother and more enjoyable. Having everything ready will help you focus on frying the olives without any distractions.
Maintain Oil Temperature
As mentioned earlier, keeping the oil at the right temperature is crucial. Use a thermometer to monitor the heat. If the oil is too hot, the coating may burn. If it’s too cool, the olives will absorb excess oil. Aim for a temperature between 350°F to 375°F (175°C to 190°C) for the best results.
Fry in Small Batches
Frying too many olives at once can lower the oil temperature, leading to soggy results. Instead, fry in small batches. This ensures each olive gets evenly cooked and crispy. Plus, it allows you to keep an eye on the frying process more easily.
Let Them Drain Properly
After frying, place the olives on paper towels to drain excess oil. This step is essential for keeping them crispy. If you want to keep them warm while frying the rest, use a wire rack in a warm oven. This will help maintain their crunchiness until serving.
Experiment with Seasonings
Feel free to get creative with your seasonings! While garlic powder, salt, and pepper are great, you can also try adding spices like paprika, cayenne pepper, or Italian herbs to the panko mixture. This will give your olives an extra flavor boost.
Serve Immediately
Crispy fried olives are best enjoyed fresh and warm. Serve them right after frying for the ultimate crunch. If you need to prepare them in advance, consider reheating them in an oven to restore their crispiness before serving.
By following these tips, you’ll be well on your way to mastering the art of crispy fried olives with garlic aioli. Enjoy the process and the delicious results!
Breakdown of Time for Crispy Fried Olives with Garlic Aioli Recipe
Understanding the time needed for each step in the crispy fried olives with garlic aioli recipe can help you plan your cooking session better. Here’s a breakdown of the time required for preparation, cooking, and the total time to enjoy this delicious snack!
Prep Time
The prep time for this recipe is approximately 20 minutes. This includes gathering all your ingredients, rinsing and drying the olives, and setting up your breading station. Additionally, you’ll need to prepare the garlic aioli, which requires mixing the ingredients and letting it chill in the refrigerator for at least 30 minutes. However, you can prepare the aioli ahead of time to save on overall cooking time.
Cooking Time
Cooking the crispy fried olives takes about 10-15 minutes. This includes heating the oil and frying the olives in batches. Each batch will take around 2-3 minutes to achieve that perfect golden brown color. Remember, frying in small batches ensures even cooking and prevents overcrowding the pan.
Total Time
In total, you can expect the entire process to take about 50-60 minutes. This includes the prep time, cooking time, and the chilling time for the garlic aioli. If you prepare the aioli in advance, you can reduce the total time significantly, making it easier to whip up this delightful snack whenever you crave it!
By keeping track of the time for each step, you can enjoy your crispy fried olives with garlic aioli without any rush. Happy cooking!
Nutritional Information for Crispy Fried Olives with Garlic Aioli Recipe
Understanding the nutritional content of your food is essential, especially when preparing delicious snacks like crispy fried olives with garlic aioli. This section will break down the key nutritional components of this recipe, helping you make informed choices while enjoying this tasty treat.
Calories
Each serving of crispy fried olives with garlic aioli contains approximately 250 calories. This calorie count includes the olives, the breading, and the garlic aioli. While this snack is rich in flavor, it’s important to enjoy it in moderation, especially if you’re watching your calorie intake. Pairing it with lighter options, like a fresh salad, can help balance your meal.
Protein
In terms of protein, this recipe provides about 5 grams per serving. The protein mainly comes from the eggs used in the breading process. While this isn’t a high-protein snack, it does contribute to your daily intake. If you’re looking to boost the protein content, consider serving the olives alongside a protein-rich dip or adding some cheese to your charcuterie board.
Sodium
The sodium content in crispy fried olives with garlic aioli is approximately 500 mg per serving. This number can vary based on the type of olives you use and the amount of salt added to the breading and aioli. Olives are naturally high in sodium due to the brining process, so it’s wise to be mindful of your overall sodium intake, especially if you have dietary restrictions.
By keeping track of these nutritional values, you can enjoy your crispy fried olives with garlic aioli while maintaining a balanced diet. Remember, moderation is key, and pairing this snack with healthier options can enhance your overall meal experience!
FAQs about Crispy Fried Olives with Garlic Aioli Recipe
Can I use different types of olives for this recipe?
Absolutely! One of the best things about crispy fried olives is their versatility. You can use various types of olives to create unique flavors. For instance, Kalamata olives offer a rich, fruity taste, while Castelvetrano olives are sweet and mild. Mixing different olives can also add a fun twist to your dish. Just make sure to choose pitted olives for easy preparation!
How can I make the garlic aioli vegan?
Making a vegan version of garlic aioli is simple! Instead of mayonnaise, use a plant-based alternative. Many brands offer vegan mayonnaise made from ingredients like aquafaba or soy. Combine this with minced garlic, lemon juice, salt, and pepper, just like in the original recipe. This way, you can enjoy the creamy dip without any animal products!
What is the best way to store leftover crispy fried olives?
If you have any leftover crispy fried olives, store them in an airtight container in the refrigerator. However, keep in mind that they are best enjoyed fresh. To reheat, place them in an oven at 350°F (175°C) for about 10 minutes. This will help restore their crispiness. Avoid microwaving, as it can make them soggy.
Can I bake the olives instead of frying them?
Yes, you can bake the olives for a healthier alternative! Preheat your oven to 400°F (200°C). After coating the olives, place them on a baking sheet lined with parchment paper. Lightly spray them with cooking oil to help achieve a golden color. Bake for about 15-20 minutes, flipping halfway through. While they may not be as crispy as fried olives, baking is a great option for a lighter snack!
Conclusion on Crispy Fried Olives with Garlic Aioli Recipe
In conclusion, crispy fried olives with garlic aioli are a delightful snack that brings together unique flavors and textures. This recipe is not only easy to follow but also allows for creativity with different types of olives and dipping sauces. Whether you’re preparing for a party or simply indulging in a tasty treat at home, these crispy olives are sure to impress.
The combination of the salty, briny olives and the crunchy panko coating creates a satisfying bite. Paired with the creamy garlic aioli, each mouthful is a burst of flavor that will leave you wanting more. Plus, the versatility of this dish means you can customize it to suit your taste preferences, making it a perfect addition to any gathering.
As you explore this recipe, remember to enjoy the cooking process. With a few simple tips and tricks, you can master the art of frying olives and create a snack that is both delicious and visually appealing. So gather your ingredients, invite some friends over, and enjoy the delightful experience of crispy fried olives with garlic aioli!
Happy cooking, and may your culinary adventures be filled with flavor and joy!
Crispy Fried Olives with Garlic Aioli
Ingredients
Equipment
Method
- Rinse the pitted green olives under cold water and pat them dry with a paper towel.
- Prepare a three-part breading station with all-purpose flour, beaten eggs, and a mixture of panko breadcrumbs, garlic powder, salt, and black pepper.
- Combine mayonnaise, minced garlic, lemon juice, salt, and black pepper in a bowl to make the garlic aioli, then refrigerate for at least 30 minutes.
- Heat vegetable oil in a deep skillet over medium heat. Dip each olive in flour, then eggs, and finally coat with the panko mixture before frying.
- Fry the olives in batches for about 2-3 minutes until golden brown, then drain on paper towels.
- Serve the crispy fried olives warm with garlic aioli for dipping.