
Introduction to Twix-Style Cookie Bars Recipe
If you love the delightful combination of chocolate, caramel, and cookie, then the Twix-Style Cookie Bars Recipe is just for you! These bars bring the classic candy bar experience right to your kitchen. They are easy to make and perfect for sharing with friends and family. Whether you’re hosting a party or just craving something sweet, these cookie bars will surely impress.
What Makes Twix-Style Cookie Bars Unique?
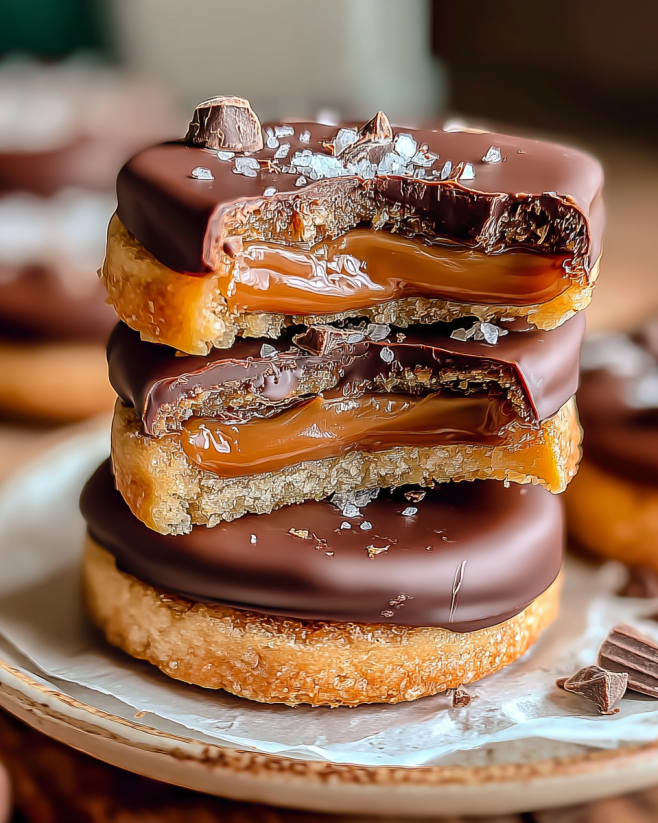
What sets Twix-Style Cookie Bars apart from other desserts? First, it’s the layers! Each bar features a buttery cookie base, a gooey caramel layer, and a rich chocolate topping. This delightful combination creates a texture that is both chewy and crunchy. Plus, the flavors blend beautifully, making every bite a treat.
Another unique aspect is the versatility of the recipe. You can easily customize it to suit your taste. Want a nutty flavor? Add some chopped nuts! Prefer a different chocolate? Swap semisweet for dark or milk chocolate. The possibilities are endless, allowing you to create a dessert that’s truly your own.
In addition, these cookie bars are perfect for any occasion. They can be served at birthday parties, holiday gatherings, or simply enjoyed as an afternoon snack. With their appealing look and delicious taste, they are sure to be a hit with everyone!
So, roll up your sleeves and get ready to bake! The Twix-Style Cookie Bars Recipe is not just a dessert; it’s an experience that brings joy and sweetness to your day.
Ingredients for Twix-Style Cookie Bars Recipe
To create the delicious Twix-Style Cookie Bars, you’ll need a few simple ingredients. Each component plays a vital role in achieving that perfect balance of flavors and textures. Here’s what you’ll need:
- 1 cup unsalted butter, softened
- 1 cup granulated sugar
- 1 cup packed brown sugar
- 2 large eggs
- 2 teaspoons vanilla extract
- 3 cups all-purpose flour
- 1 teaspoon baking soda
- 1/2 teaspoon salt
- 1 cup caramel sauce (store-bought or homemade)
- 1 cup semisweet chocolate chips
- 1 tablespoon vegetable oil
These ingredients are easy to find at your local grocery store. The unsalted butter adds richness, while the sugars provide sweetness and moisture. Eggs and vanilla extract enhance the flavor and texture of the cookie base. The flour, baking soda, and salt work together to create a sturdy yet soft cookie layer.
The caramel sauce is the star of the show, giving that gooey, sweet layer that everyone loves. Finally, the chocolate chips and vegetable oil create a smooth, luscious topping that ties everything together. With these ingredients, you’re well on your way to making a delightful treat that will satisfy your sweet tooth!
Step-by-Step Preparation of Twix-Style Cookie Bars Recipe
Now that you have all your ingredients ready, it’s time to dive into the fun part: preparing your Twix-Style Cookie Bars! Follow these simple steps to create a delicious treat that everyone will love.
Step 1: Preparing the Cookie Base
Start by preheating your oven to 350°F (175°C). This ensures that your cookie base bakes evenly. Next, take a large mixing bowl and cream together the softened butter, granulated sugar, and brown sugar. Use an electric mixer for about 3-5 minutes until the mixture is light and fluffy. This step is crucial as it incorporates air, making your cookie base soft and tender.
Once your butter and sugars are well combined, add the eggs one at a time. Make sure to mix well after each addition. Then, stir in the vanilla extract for that extra burst of flavor. In a separate bowl, whisk together the flour, baking soda, and salt. Gradually add this dry mixture to your wet ingredients, mixing until just combined. Be careful not to overmix, as this can make your cookie base tough.
Step 2: Making the Caramel Layer
While your cookie base is resting, it’s time to prepare the caramel layer. If you’re using store-bought caramel sauce, simply set it aside. If you prefer homemade caramel, you can make it by melting sugar in a saucepan over medium heat until it turns golden brown. Then, add cream and stir until smooth. Allow it to cool slightly before using.
Once your cookie base is baked, remove it from the oven after 15 minutes. Drizzle the caramel sauce evenly over the warm cookie layer. This allows the caramel to soak in a bit, enhancing the flavor. Make sure to cover the entire surface for a deliciously gooey experience!
Step 3: Assembling the Twix-Style Cookie Bars
Now comes the fun part—assembling your Twix-Style Cookie Bars! After drizzling the caramel, sprinkle the chocolate chips evenly over the caramel layer. This adds a rich chocolatey flavor that pairs perfectly with the sweet caramel.
Next, take the remaining cookie dough and crumble it over the chocolate chips and caramel. This creates a beautiful layered effect. Make sure to spread it evenly, so every bite has a bit of everything. Once assembled, return the pan to the oven and bake for an additional 20-25 minutes. You’ll know it’s ready when the top is golden brown and the edges are slightly crisp.
Step 4: Adding the Chocolate Topping
After baking, allow your cookie bars to cool in the pan for at least 30 minutes. For easier cutting, you can refrigerate them for an additional 30 minutes. While they cool, prepare the chocolate topping. In a small microwave-safe bowl, combine the chocolate chips and vegetable oil. Microwave in 30-second intervals, stirring in between, until melted and smooth.
Once melted, drizzle the chocolate over the cooled cookie bars. This final touch adds a glossy finish and extra flavor. Allow the chocolate to set before cutting the bars into squares. Now, you’re ready to serve your delicious Twix-Style Cookie Bars!
Variations of Twix-Style Cookie Bars Recipe
While the classic Twix-Style Cookie Bars are delicious as they are, you can easily adapt the recipe to meet different dietary needs or personal preferences. Here are two popular variations that everyone can enjoy!
Gluten-Free Twix-Style Cookie Bars
If you or someone you know is gluten-sensitive, you can still enjoy these tasty treats! To make gluten-free Twix-Style Cookie Bars, simply substitute the all-purpose flour with a gluten-free flour blend. Many blends work well, but look for one that includes xanthan gum for better texture.
Additionally, ensure that your caramel sauce is gluten-free. Most store-bought options are, but it’s always good to check the label. Follow the same steps as the original recipe, and you’ll have a delightful gluten-free dessert that everyone can enjoy!
Vegan Twix-Style Cookie Bars
For those following a vegan diet, you can easily modify the Twix-Style Cookie Bars Recipe. Start by replacing the unsalted butter with a plant-based butter or coconut oil. Instead of eggs, use flax eggs (1 tablespoon of ground flaxseed mixed with 2.5 tablespoons of water for each egg) or applesauce as a binding agent.
Make sure to choose a vegan caramel sauce, or you can make your own using coconut milk and brown sugar. For the chocolate topping, use dairy-free chocolate chips. With these simple swaps, you’ll create a delicious vegan version of the Twix-Style Cookie Bars that everyone will love!
Cooking Note for Twix-Style Cookie Bars Recipe
When making the Twix-Style Cookie Bars, there are a few important cooking notes to keep in mind. These tips will help ensure that your bars turn out perfectly every time!
First, always preheat your oven. This step is crucial for even baking. If the oven isn’t hot enough, your cookie bars may not rise properly, leading to a dense texture. Make sure to check the temperature with an oven thermometer if you have one, as some ovens can be off by a few degrees.
Next, be mindful of the baking time. Every oven is different, so keep an eye on your bars as they bake. The edges should be golden brown, while the center may look slightly underbaked. This is okay! The bars will continue to cook as they cool in the pan.
Additionally, when you’re layering the caramel and chocolate, try to spread them evenly. This ensures that every bite is packed with flavor. If you find the caramel is too thick, you can warm it slightly to make it easier to drizzle.
Lastly, patience is key! Allow the bars to cool completely before cutting. This helps them set and makes slicing easier. If you’re in a hurry, refrigerating them for a bit can speed up the cooling process.
By following these cooking notes, you’ll create delicious Twix-Style Cookie Bars that are sure to impress your family and friends!
Serving Suggestions for Twix-Style Cookie Bars Recipe
Once your Twix-Style Cookie Bars are baked and cooled, it’s time to think about how to serve them! These delicious treats are versatile and can be enjoyed in various ways. Here are some delightful serving suggestions to elevate your dessert experience:
- With a Scoop of Ice Cream: Serve your cookie bars warm with a scoop of vanilla or caramel ice cream on top. The melting ice cream pairs perfectly with the warm, gooey caramel and chocolate.
- Drizzled with Extra Caramel: For those who can’t get enough caramel, drizzle some extra caramel sauce over the top before serving. This adds an extra layer of sweetness and richness.
- Accompanied by Fresh Fruit: Balance the sweetness of the cookie bars with fresh fruit. Slices of strawberries, bananas, or even a handful of raspberries can add a refreshing touch.
- As a Party Platter: Cut the bars into smaller squares and arrange them on a platter. This makes for a great dessert option at parties or gatherings, allowing guests to enjoy a bite-sized treat.
- With a Cup of Coffee or Tea: Pair your cookie bars with a warm cup of coffee or tea. The rich flavors of the bars complement the warmth of your beverage, making for a cozy snack.
These serving suggestions not only enhance the flavor but also make your Twix-Style Cookie Bars a delightful centerpiece for any occasion. Whether you’re enjoying them at home or sharing with friends, these bars are sure to be a hit!
Tips for Perfecting Your Twix-Style Cookie Bars Recipe
To make your Twix-Style Cookie Bars truly exceptional, consider these helpful tips. They will guide you in achieving the perfect texture and flavor, ensuring that every bite is a delight!
First, use room temperature ingredients. This means letting your butter and eggs sit out for about 30 minutes before you start. Room temperature ingredients mix more easily, creating a smoother batter. This can lead to a lighter, fluffier cookie base.
Next, don’t skip the chilling step! If you have time, chill your cookie dough for about 30 minutes before baking. This helps the cookies maintain their shape and prevents them from spreading too much in the oven. Chilled dough also enhances the flavor as it allows the ingredients to meld together.
When it comes to the caramel layer, be generous! A thick layer of caramel adds a gooey texture that everyone loves. If you find your caramel sauce is too thick, warm it slightly in the microwave to make it easier to drizzle.
For the chocolate topping, consider using high-quality chocolate chips. The better the chocolate, the richer the flavor of your bars. You can also mix in a bit of sea salt with the melted chocolate for a sweet and salty contrast that elevates the taste.
Lastly, experiment with add-ins! Feel free to mix in chopped nuts, like pecans or almonds, for added crunch. You can also try adding a sprinkle of sea salt on top of the chocolate drizzle for an extra flavor boost. These small tweaks can make a big difference in your final product.
By following these tips, you’ll be well on your way to creating the ultimate Twix-Style Cookie Bars that will impress everyone who tries them!
Breakdown of Time for Twix-Style Cookie Bars Recipe
Understanding the time needed for each step in the Twix-Style Cookie Bars Recipe can help you plan your baking session better. Here’s a simple breakdown of the time required for preparation, cooking, and cooling:
Prep Time
Getting everything ready is the first step. This includes measuring your ingredients and mixing the cookie dough. Expect to spend about 20-30 minutes on prep time. This is when you’ll cream the butter and sugars, add the eggs, and mix in the dry ingredients.
Cooking Time
Once your cookie bars are assembled, they need to bake. The first baking session takes about 15 minutes for the cookie base. After adding the caramel and chocolate layers, bake for an additional 20-25 minutes. In total, the cooking time is around 35-40 minutes.
Total Time
When you combine the prep and cooking times, you’re looking at approximately 55-70 minutes to make your Twix-Style Cookie Bars. However, don’t forget to factor in the cooling time! Allowing the bars to cool for at least 30 minutes (or refrigerating for an extra 30 minutes) is essential for easy cutting and serving. So, the total time from start to finish can be around 1.5 to 2 hours.
By keeping this time breakdown in mind, you can ensure a smooth baking experience. You’ll be enjoying your delicious Twix-Style Cookie Bars in no time!
Breakdown of Time for Twix-Style Cookie Bars Recipe
Understanding the time needed for each step in the Twix-Style Cookie Bars Recipe can help you plan your baking session better. Here’s a simple breakdown of the time required for preparation, cooking, and cooling:
Prep Time
Getting everything ready is the first step. This includes measuring your ingredients and mixing the cookie dough. Expect to spend about 20-30 minutes on prep time. This is when you’ll cream the butter and sugars, add the eggs, and mix in the dry ingredients. Having everything organized will make the process smoother and more enjoyable!
Cooking Time
Once your cookie bars are assembled, they need to bake. The first baking session takes about 15 minutes for the cookie base. After adding the caramel and chocolate layers, bake for an additional 20-25 minutes. In total, the cooking time is around 35-40 minutes. Keep an eye on the bars as they bake, ensuring they reach that perfect golden brown color!
Total Time
When you combine the prep and cooking times, you’re looking at approximately 55-70 minutes to make your Twix-Style Cookie Bars. However, don’t forget to factor in the cooling time! Allowing the bars to cool for at least 30 minutes (or refrigerating for an extra 30 minutes) is essential for easy cutting and serving. So, the total time from start to finish can be around 1.5 to 2 hours. This includes all the delicious anticipation as you wait for your sweet creation to be ready!
By keeping this time breakdown in mind, you can ensure a smooth baking experience. You’ll be enjoying your delicious Twix-Style Cookie Bars in no time!
Nutritional Information for Twix-Style Cookie Bars Recipe
Understanding the nutritional content of your Twix-Style Cookie Bars can help you enjoy them in moderation. Here’s a breakdown of the key nutritional information per serving, which is based on cutting the bars into 12 squares. This way, you can indulge while keeping track of your dietary intake!
Calories
Each serving of the Twix-Style Cookie Bars contains approximately 320 calories. This calorie count includes the rich flavors from the butter, sugars, and chocolate, making it a satisfying treat. While it’s important to enjoy these bars, being mindful of the calorie content can help you balance your overall diet.
Protein
In terms of protein, each serving provides about 3 grams. While this isn’t a high protein snack, it does contribute to your daily intake. Pairing these cookie bars with a protein-rich food, like a glass of milk or a handful of nuts, can enhance the nutritional value of your snack.
Sodium
The sodium content in each serving is approximately 150 mg. This amount is relatively moderate, but if you’re watching your sodium intake, it’s good to keep this in mind. Using unsalted butter and checking the sodium levels in your caramel sauce can help you control the overall sodium content in your dessert.
By being aware of the nutritional information, you can enjoy your Twix-Style Cookie Bars while maintaining a balanced diet. Remember, moderation is key, and these delicious bars can be a delightful part of your sweet treats!
FAQs about Twix-Style Cookie Bars Recipe
Can I make Twix-Style Cookie Bars ahead of time?
Absolutely! You can prepare your Twix-Style Cookie Bars ahead of time. In fact, they taste even better after sitting for a day, as the flavors meld together. Once baked and cooled, simply store them in an airtight container at room temperature. If you want to keep them fresh for longer, you can refrigerate them. Just remember to let them come to room temperature before serving for the best taste and texture!
How should I store Twix-Style Cookie Bars?
To keep your Twix-Style Cookie Bars fresh, store them in an airtight container. If you have leftovers, they can last for about a week at room temperature. For longer storage, consider refrigerating them, which can extend their shelf life to about two weeks. If you want to keep them even longer, you can freeze the bars. Just wrap them tightly in plastic wrap and then place them in a freezer-safe bag. They can be frozen for up to three months. When you’re ready to enjoy them, simply thaw them in the refrigerator overnight.
Can I substitute ingredients in the Twix-Style Cookie Bars Recipe?
Yes, you can definitely substitute ingredients in the Twix-Style Cookie Bars Recipe! If you need to make it gluten-free, use a gluten-free flour blend instead of all-purpose flour. For a vegan version, swap the butter for plant-based butter and use flax eggs or applesauce instead of regular eggs. You can also change the type of chocolate chips based on your preference—milk chocolate, dark chocolate, or even white chocolate work well. Just keep in mind that substitutions may slightly alter the taste and texture, but they can still yield delicious results!
Conclusion on Twix-Style Cookie Bars Recipe
In conclusion, the Twix-Style Cookie Bars Recipe is a delightful treat that combines the best elements of a classic candy bar into a homemade dessert. With its rich layers of buttery cookie, gooey caramel, and smooth chocolate, this recipe is sure to satisfy your sweet cravings. Not only is it easy to make, but it also allows for plenty of customization to suit your taste preferences.
Whether you choose to enjoy these bars at a gathering, as a special dessert for family, or simply as a sweet snack, they are bound to impress. The versatility of the recipe means you can adapt it to fit various dietary needs, making it a go-to option for everyone. From gluten-free to vegan variations, there’s a way for everyone to indulge in this delicious treat.
As you embark on your baking journey, remember the tips and tricks shared throughout this article. They will help you create the perfect Twix-Style Cookie Bars every time. So, gather your ingredients, preheat your oven, and get ready to enjoy a delightful dessert that brings joy to any occasion.
Happy baking, and may your Twix-Style Cookie Bars bring smiles and sweetness to your day!
Twix-Style Cookie Bars
Ingredients
Equipment
Method
- Preheat your oven to 350°F (175°C). Cream together the softened butter, granulated sugar, and brown sugar in a large mixing bowl using an electric mixer for about 3-5 minutes until light and fluffy. Add the eggs one at a time, mixing well after each addition, then stir in the vanilla extract. In a separate bowl, whisk together the flour, baking soda, and salt. Gradually add the dry mixture to the wet ingredients, mixing until just combined.
- Bake the cookie base for 15 minutes. Remove from the oven and drizzle the caramel sauce evenly over the warm cookie layer. Sprinkle the chocolate chips over the caramel layer, then crumble the remaining cookie dough over the top. Return to the oven and bake for an additional 20-25 minutes until the top is golden brown.
- Allow the cookie bars to cool in the pan for at least 30 minutes. For easier cutting, refrigerate for an additional 30 minutes. Prepare the chocolate topping by melting the chocolate chips and vegetable oil in a microwave-safe bowl in 30-second intervals until smooth. Drizzle the melted chocolate over the cooled cookie bars and let it set before cutting into squares.