
Do you remember those moments in life when you taste something so amazing, so perfectly balanced, that it makes you stop and close your eyes? Maybe it was a rich, dark piece of chocolate, or perhaps a juicy, sweet orange on a chilly day. Now, imagine bringing those two perfect flavors together in one incredible dessert: the Chocolate Orange Cheesecake.
This isn’t just a dessert; it’s a celebration. It’s the rich, cozy comfort of chocolate meeting the bright, zesty joy of citrus. It’s creamy, smooth, crunchy, and refreshing all at once. For years, people have loved the combination of chocolate and orange—it’s a flavor pairing that feels both classic and surprising. We’re here to take you on a culinary adventure that will show you exactly how to create this spectacular homemade cheesecake. You’ll learn the secrets to a perfect, crack-free filling, a crunchy foundation, and a flavor that will make you feel like a kitchen superhero. Get ready to bake a memory that tastes like pure bliss!
The Ultimate Dessert Duo: Why Chocolate and Orange Work
Have you ever wondered why some flavors just belong together? Think of peanut butter and jelly, or salt and caramel. Chocolate and orange are another one of those magical pairings. This combination is centuries old and popular all over the world, especially in Europe.
The Science of Sweet and Zest
The reason it works so well is simple chemistry, but you don’t need a science degree to appreciate it!
- Dark Chocolate’s Richness: When you taste dark chocolate, you get deep, earthy, slightly bitter notes. This richness is complex and satisfying.
- Orange’s Brightness: The orange, especially the zest, has oils that smell intensely citrusy and fresh. This brightness acts like a spotlight for the rich, dark flavor of the chocolate.
- A Perfect Contrast: The tanginess and zest cut through the heaviness of the cream cheese and chocolate, making the entire dessert taste lighter and more exciting. Instead of just tasting a heavy cream cheese filling, you get a vibrant, almost electric, flavor that dances on your tongue. This bright, beautiful contrast is what makes this Chocolate Orange Cheesecake such an exciting rich dessert to eat.
A Perfect Blend: The History of Cheesecake’s Global Journey
Cheesecake might seem like a modern dessert, but its history is ancient! It was eaten by athletes in ancient Greece before the very first Olympic Games because it was seen as a good source of energy.
When the Romans conquered Greece, they adopted the recipe and brought it back to Rome, changing it slightly. Later, as different cultures refined and experimented, the dessert evolved. Fast forward to the modern era, and the American style of cheesecake, which uses cream cheese (invented in the late 1800s), became famous for its dense, creamy filling. Your homemade cheesecake combines this creamy American style with the classic European flavor of orange and dark chocolate, making it truly a global treat!
Your Baking Mission: Preparing for the Ultimate Chocolate Orange Cheesecake
Successful baking starts before you even turn on the mixer. Think of this as your mission briefing. We’re going to gather everything, double-check the supplies, and get into the right mindset for kitchen magic.
Gathering the Goodies: Ingredients for Success
It is always important to use high-quality ingredients for a dessert like this, especially the chocolate and the cream cheese, which make up most of the flavor and texture of the filling. This is a very impressive citrus dessert, and it’s worth the effort to get the best ingredients.
| Component | Ingredient | Quantity | Key Details |
|---|---|---|---|
| Crust | Graham Cracker Crumbs | 2 cups | Use finely crushed crumbs. |
| Crust | Unsalted Butter | ½ cup | Must be fully melted for binding. |
| Filling Base | Cream Cheese (full-fat) | 24 oz (3 bricks) | Must be softened to room temperature! |
| Filling Base | Granulated Sugar | 1 cup | Used to sweeten the cream cheese. |
| Filling Flavor | Dark Chocolate (60-70% cocoa) | 8 oz | Melted and cooled slightly. |
| Filling Structure | Heavy Whipping Cream | 1 cup | Needs to be whipped before folding in. |
| Filling Flavor | Fresh Oranges | Zest and juice of 2 large | Provides the essential citrus flavor. |
H3: Tools of the Trade: Equipment You’ll Need
Having the right tools makes this recipe much easier and helps guarantee that smooth, creamy filling.
- Springform Pan (Mandatory): This is a must-have for cheesecake. The sides detach from the base, allowing you to remove the delicate dessert without flipping it or destroying the edges.
- Electric Mixer: You will need this to beat the cream cheese and to whip the heavy cream. A stand mixer or a handheld mixer works great.
- Mixing Bowls: At least two, one for the crust and one for the filling.
- Rubber Spatula: Essential for folding the melted chocolate and whipped cream gently into the filling.
- Microplane or Zester: The best tool for getting the bright, flavorful zest from the oranges without scraping off the bitter white pith.
A Crucial Note: Temperature Matters
For a perfectly smooth cheesecake, your ingredients must be at the right temperature. The cream cheese and the heavy whipping cream should be at room temperature. If the cream cheese is cold, it will have lumps, and no amount of beating will make it smooth. If the melted chocolate is too hot when you add it, it can “cook” the cream cheese or deflate the whipped cream. Plan ahead!
Phase 1: Building the Strong Foundation—The Graham Cracker Crust
Every great building needs a solid foundation, and your Chocolate Orange Cheesecake is no different. The crust holds everything together and provides a crunchy contrast to the velvety filling.
The Perfect Press: Getting the Crust Just Right
This crust is a simple mix, but the way you press it into the pan is the key to success.
- Mixing the Base: Preheat your oven to 350°F (175°C). In a bowl, combine your 2 cups of graham cracker crumbs and your melted ½ cup of unsalted butter. Use a fork to mix them until every crumb is moistened and looks like wet sand.
- Pressing Power: Pour the mixture into your springform pan. Use the bottom of a flat glass or measuring cup to press the crumbs firmly and evenly across the bottom and slightly up the sides of the pan. The crust needs to be dense—pressing hard is essential! The denser the crust, the less likely it is to crumble when you slice the cake later.
H4: Quick Baking Tip: Why We Bake the Crust
You might wonder why we bake the crust for just 10 minutes before adding the filling. This is called “pre-baking” or “blind baking,” and it serves a very important purpose.
- Sticking Together: Baking the crust helps the butter set the crumbs firmly in place, so they stick together and don’t fall apart when you cut the dessert.
- Preventing Soggy Bottoms: The short baking time removes some of the moisture, creating a barrier that prevents the crust from getting soggy when the wet, creamy filling is poured on top. Once it comes out of the oven, make sure it cools completely before moving on—a hot crust can melt your filling!
Phase 2: Mastering the Creamy, Citrusy Filling
This is the main event! The filling combines four key elements: the rich cream cheese base, the necessary sugar, the bright orange flavor, and the fluffy whipped cream. Getting this part right requires smooth technique.
Cream Cheese Secrets: Softening for Smoothness
As mentioned, your 24 oz of full-fat cream cheese must be soft. If it’s cold, the electric mixer will just break it into chunky bits.
- The Beat Down: Start by beating the cream cheese alone in your mixer until it is perfectly smooth and has no lumps. It should look like thick, fluffy frosting. This aeration is important for a lighter creamy texture.
- Sugar Slowly: Gradually add the 1 cup of granulated sugar while the mixer is running slowly. If you dump it all in at once, the sugar dust will fly everywhere! Once the sugar is in, beat the mixture for a few more minutes until it’s light and fluffy. This dissolves the sugar, ensuring your finished filling isn’t grainy.
The Bright Pop: Adding Fresh Orange Flavor
Using real zest and juice is the secret to this amazing citrus dessert. Artificial flavors won’t give you the same bright, fresh taste.
- Zest First: Add the zest and juice of 2 large fresh oranges to the cream cheese mixture. The zest holds most of the intense oil and flavor. The juice adds liquid and balances the sweetness.
- Mixing Time: Mix these in on low speed, just until they are combined. You don’t want to overmix at this stage, as the acidity in the juice can slightly change the texture of the cheese.
H4: Zesting vs. Juicing: What’s the Difference?
It’s vital to know the difference between zest and juice in baking.
- Zest: This is the colorful, thin outer layer of the orange peel. It is packed with essential oils that contain the deepest flavor and aroma. When you zest, always stop when you hit the white part underneath (the pith), as the pith is bitter and will spoil the flavor of your homemade cheesecake.
- Juice: This adds liquid, tartness, and sweetness. The juice is important for balancing the sugar, but the zest is the source of the amazing, long-lasting aroma in your filling. For this recipe, you need both!
Phase 3: The Chocolate Transformation
This is where the dessert earns its first name: Chocolate. You need to prepare the dark chocolate and then gently combine it with the light, fluffy cream base.
Melting Magic: Handling Dark Chocolate
You need 8 oz of dark chocolate (60-70% cocoa). Using dark chocolate is important because its slight bitterness is what contrasts so perfectly with the sweet cream and orange zest.
- Melting Methods: The easiest way to melt chocolate is in the microwave in 30-second bursts, stirring between each burst until it’s smooth. Alternatively, you can use a double boiler (a heatproof bowl placed over a pot of simmering water) which melts the chocolate more evenly.
- Cooling is Crucial: Once melted, let the chocolate cool slightly—about 10 minutes. If you add hot chocolate to the cream cheese mixture, it will cause the fat in the cream cheese to separate, making the filling lumpy and grainy, not smooth and creamy.
The Whip: Preparing the Heavy Cream
The 1 cup of heavy whipping cream is what makes the filling light and airy. If you skip this step, the cheesecake will be dense and heavy.
- Whip it Up: Beat the cold heavy cream in a separate bowl until it forms soft peaks. This means when you lift the whisk, the peaks of cream stand up but curl over slightly. Don’t over-beat it, or you’ll accidentally make butter!
The Fold: Incorporating Whipped Cream and Chocolate Gently
This is a step where patience pays off. You want to combine the airy whipped cream and the heavy chocolate into the cream cheese without deflating the air you just whipped in.
- Chocolate First: Pour the slightly cooled, melted dark chocolate into the cream cheese mixture and mix on low speed just until combined.
- The Gentle Fold: Now, using your rubber spatula, carefully scoop the whipped cream into the chocolate cream cheese mixture. Fold it in gently. Folding means cutting down the center with the spatula, scooping up the mixture from the bottom, and folding it over the top. Repeat until no white streaks of cream remain. The finished filling should be fluffy and a beautiful, even light brown color. This gentle technique gives you the perfect creamy texture for your Chocolate Orange Cheesecake.
The Final Countdown: Setting and Serving Your Creation
The hard work is done! Now we move to the final, necessary steps that will transform your filling into a sliceable, magnificent dessert.
Patience is Power: Why Chilling is Non-Negotiable
Once your velvety filling is ready, pour it into the cooled graham cracker crust. Then, cover it lightly with plastic wrap and move it to the refrigerator. This is the hardest part for any baker: waiting!
- The Science of Setting: The cheesecake needs at least 4 hours, but ideally overnight, in the refrigerator. During this time, the fats in the cream cheese and the butter in the crust firm up, and the structure of the filling sets. If you try to cut it too soon, it will be soft and mushy. You need the time for that solid, perfect refrigerated dessert result.
- Setting Time is Flavor Time: The chilling also allows all the amazing flavors—the bright orange, the rich chocolate, and the creamy vanilla from the cream cheese—to fully blend and deepen. It will taste even better tomorrow!
The Grand Reveal: Tips for Easy Springform Removal
The moment you’ve waited for: removing the pan!
- Run a Knife: Once the cheesecake is completely chilled, take a sharp, thin knife and run it gently around the inside edge of the pan. This ensures the filling isn’t stuck to the sides, preventing tears or cracks when the pan is opened.
- Release and Lift: Unclasp the springform pan and gently lift the side ring straight up. If your homemade cheesecake is properly set, it should stand tall and perfectly smooth.
Elevating the Experience: Garnish and Presentation
Presentation is just as important as the taste. Garnish is the final coat of paint on your masterpiece.
Designing the Top: Simple Garnish Ideas
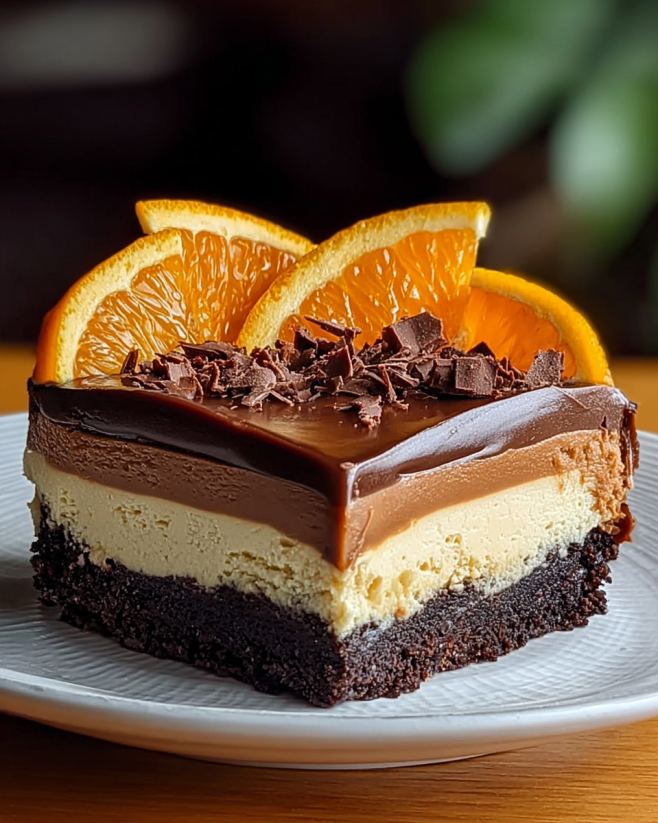
You were instructed to garnish with melted chocolate and orange slices. Here are a few ways to make that truly stunning:
- Melted Chocolate Drizzle: Melt a small amount of dark chocolate (about 1/4 cup) and put it into a small ziplock bag. Snip a tiny corner off the bag and drizzle the chocolate across the top of the chilled cheesecake in a decorative zigzag pattern. This creates a beautiful, instant dark chocolate ganache effect.
- Candied Orange Slices: For a professional look, instead of fresh slices, try candied orange slices. They look shiny and elegant, and they taste sweet and wonderful. You can also simply use thin, fresh orange slices or segments arranged neatly around the edge.
- Zest Dusting: Use the microplane to dust a little extra fresh orange zest over the top before serving. This provides an extra pop of color and aroma.
Slicing Like a Pro
To get perfect, clean slices of your Chocolate Orange Cheesecake, remember this trick:
- Hot Knife: Fill a tall cup with hot water. Dip your slicing knife into the hot water for 30 seconds, wipe it completely dry (the heat is what matters, not the water!), and then make your cut.
- Wipe Between Slices: Repeat the hot water and drying process before making each new cut. The warm, dry blade glides smoothly through the chilled filling, giving you perfectly clean slices every time.
Troubleshooting and Expert Baking Tips
Even with the best instructions, problems can pop up. Knowing how to fix them, or better yet, how to prevent them, is what separates a good baker from a great one!
Avoiding Cracks: Temperature Control is Key
The biggest fear for any cheesecake baker is that huge crack running across the top. Since this is a no-bake method (only the crust is baked), you don’t have to worry about the terrible cooling cracks that happen in baked cheesecakes, but you can still run into issues.
- Keep it Gentle: Over-beating the cream cheese and especially over-folding the whipped cream and chocolate can incorporate too much air. When that air escapes in the fridge, it can sometimes cause the surface to settle unevenly. Remember to mix only until combined.
- Consistent Chill: Avoid moving the cheesecake in and out of the fridge repeatedly while it’s setting. Let it sit undisturbed overnight for the most consistent and smooth result.
H4: Solving the Soggy Crust Mystery
If your crust seems soggy, it’s almost always because you didn’t cool the crust completely before adding the filling.
- Cool It Down: Even if it feels cool to the touch, wait until the pan is fully room temperature before pouring in the filling. Hot crust + cold filling = disaster.
Frequently Asked Questions (FAQ)
You might have a few lingering questions about creating this spectacular refrigerated dessert. Here are the answers to the most common ones.
Q1: What can I use if I don’t have a springform pan?
While a springform pan is the best option for easy serving, you can use a regular pie dish. If you do, line the pie dish with parchment paper first, allowing the paper to hang over the edges. Once the cheesecake is fully set, you can use these parchment paper “handles” to lift the entire cake out of the dish before slicing.
Q2: Can I use milk chocolate instead of dark chocolate?
Yes, you can, but it will change the flavor significantly. Milk chocolate is much sweeter and contains less intense cocoa flavor. If you use it, you might want to slightly reduce the amount of granulated sugar in the cream cheese filling, or the Chocolate Orange Cheesecake will be intensely sweet. The slight bitterness of dark chocolate is key to the balanced flavor profile.
Q3: Can I make this a day or two ahead of time?
Absolutely! Cheesecake is one of the best desserts for making ahead of time. The flavors actually deepen and improve after 24 hours. You can make the entire cheesecake (crust and filling) up to three days in advance. Just store it tightly covered in the refrigerator and wait to add the final garnishes (like fresh orange slices and chocolate drizzle) until just before you serve it.
Q4: How do I store leftovers, and how long will they last?
Leftovers should be covered tightly with plastic wrap or stored in an airtight container in the refrigerator. Because it contains dairy, it should be eaten within 5 to 7 days. Make sure to keep it away from strong-smelling foods, as cream cheese easily absorbs odors.
Q5: Can I substitute a different type of crust, like a chocolate wafer crust?
Yes! The graham cracker crust is classic, but a crust made from chocolate wafers, Oreo cookies, or even shortbread cookies is a delicious substitute. Use the same ratio: 2 cups of crushed crumbs mixed with ½ cup of melted butter. Any of these crusts would pair wonderfully with the citrus zest and chocolate filling.
Q6: I can’t find heavy whipping cream. Can I use evaporated milk instead?
No, those are not the same. Heavy whipping cream is essential because it is whipped to incorporate air, which gives the cheesecake its light, fluffy texture and firmness. Evaporated milk is just liquid milk that has been reduced, and it will not whip up or give the filling the required creamy texture and stability. You must use a cream that can be whipped, such as heavy cream or double cream.
Ready to Bake? Your Next Culinary Adventure Awaits
You’ve learned about the perfect crust, the secrets to a smooth, creamy filling, the magic of folding, and the critical importance of the chilling time. You are now fully equipped with all the baking tips and techniques needed to create this show-stopping Chocolate Orange Cheesecake. This dessert is a masterpiece, and you are the artist!
Think about the joy of serving this impressive dessert at your next gathering. The first slice you cut, the perfect dark chocolate ganache drizzle, and the bright, fresh scent of orange will all be thanks to your patience and skill. This is your chance to try out this amazing recipe and share some kitchen magic with your friends and family.
Your Actionable Step: Check your local grocery store for the three key ingredients: full-fat cream cheese, graham cracker crumbs, and high-quality dark chocolate (60-70% cocoa). Once you have those, commit to making this cake this weekend. Click here for more great baking ideas! (This is a placeholder for a link to a relevant resource) You’ve got this!
Chocolate Orange Cheesecake
Ingredients
Equipment
Method
- Preheat the oven to 350°F (175°C).
- Make Crust: Combine the graham cracker crumbs and melted butter. Press the mixture firmly into the bottom of a springform pan.
- Bake Crust: Bake the crust for 10 minutes and then set it aside to cool completely.
- Beat Cream Cheese: In a large bowl, beat the room-temperature cream cheese until it is smooth and lump-free.
- Add Sweeteners and Citrus: Gradually add the granulated sugar, then mix in the orange zest and juice until just combined.
- Melt Chocolate: Melt the dark chocolate (using a microwave or double boiler) and let it cool slightly until it is warm but not hot.
- Fold in Chocolate and Cream: Gently fold the slightly cooled melted chocolate into the cream cheese mixture. Then, whip the heavy cream in a separate bowl until stiff peaks form, and gently fold the whipped cream into the cheesecake filling.
- Chill: Pour the filling into the cooled crust. Smooth the top with a spatula.
- Refrigerate for at least 4 hours or overnight until the cheesecake is fully set.
- Serve: Garnish with extra melted chocolate drizzles and fresh orange slices before serving.