
Have you ever had one of those afternoons? It’s gray outside, or maybe it’s just a long Tuesday, and you want… something. You want a treat. You want something warm, sweet, and comforting, but the idea of pulling out a dozen ingredients, softening butter, and spending hours on a complicated recipe feels exhausting. You just want a simple, cozy hug in the form of a snack.
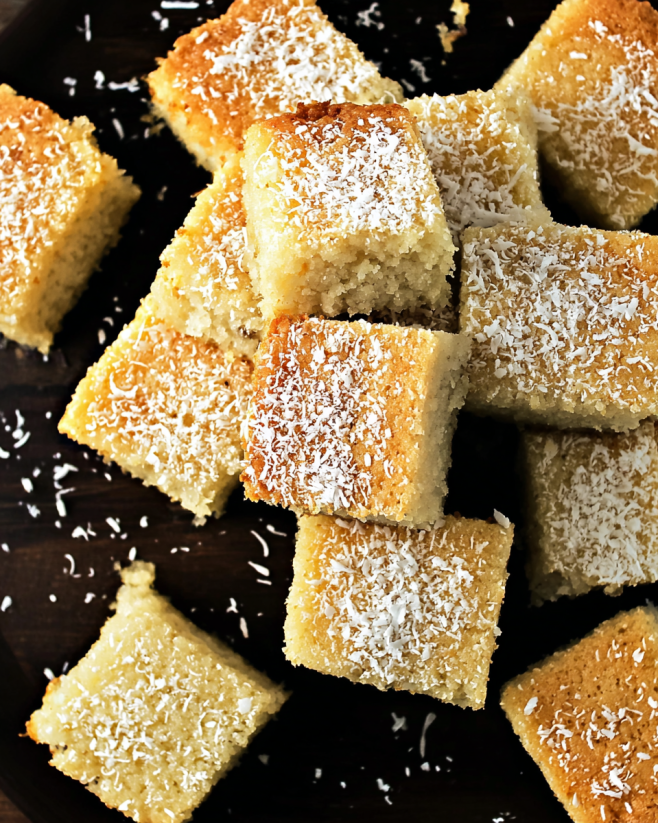
This, right here, is the answer. This Coconut Milk Snack Cake is the recipe you’ve been waiting for. It’s a humble, one-pan wonder that tastes like a tropical vacation and feels like your favorite fluffy blanket. It’s the kind of cake that doesn’t need a special occasion. Its special occasion is right now. Using the magic of canned coconut milk, this cake creates an unbelievably moist, tender crumb with a gentle, sweet coconut flavor that is absolutely addictive.
Forget everything you think you know about complicated baking. You don’t need a stand mixer. You don’t need to wait for butter to soften. You just need a can of coconut milk, a few pantry staples, and about an hour. Ready? Let’s bake something truly special.
What Makes This Coconut Milk Snack Cake So Special?
In a world of towering, frosted, multi-layer cakes, why does this simple 8×8 square of goodness deserve a place in your baking rotation? Oh, let me tell you.
The Magic of Simplicity
This cake is the definition of “less is more.” It’s not trying to be fancy. It doesn’t need a thick layer of buttercream or a complicated filling. Its charm is in its simplicity. The texture is so soft and moist that it shines all by itself. A little dusting of powdered sugar is all it needs to feel complete.
Because it’s so simple, it’s the perfect “anytime” cake. It’s a “snack cake,” which means it’s just as good with your morning coffee as it is for a late-night treat. It’s perfect for packing in a lunchbox or bringing to a friend’s house without any fuss.
A Pantry-Friendly Wonder
The best recipes are the ones you can make right now. This cake relies on ingredients that are easy to keep on hand. The star ingredient, canned coconut milk, can sit in your pantry for months, just waiting for its moment to shine. The same goes for coconut oil and shredded coconut.
This is the perfect recipe for a last-minute baking urge. No need to run to the store for fresh milk or butter. You likely have everything you need waiting for you in the cupboard.
Let’s Talk About the Star: Full-Fat Canned Coconut Milk
This is the most important ingredient in the entire recipe. It’s the secret to the cake’s incredible texture and flavor. But not all coconut milk is created equal, and if you use it wrong, your cake won’t turn out right.
Why Full-Fat? The Science of Coconut Cream
When you look for coconut milk, you must buy the kind in a can, and it must be full-fat. Do not grab the low-fat version, and absolutely do not use the coconut milk beverage that comes in a carton in the refrigerated section (the kind you pour on cereal).
Why? Canned, full-fat coconut milk is made from pressed coconut meat and water. When it sits in the can, it separates. You’ll open it and find a thick, heavy, almost solid layer of white coconut cream on top, with a thin, watery liquid underneath.
That thick cream on top? That’s pure fat. And in baking, fat equals flavor and moisture. This rich coconut fat is what gives the cake its tender crumb and rich, luxurious feel. The low-fat versions or carton milks just won’t have enough of this magic ingredient.
The Most Important Step: Homogenizing Your Coconut Milk
Because the coconut milk separates in the can, you cannot just scoop some off the top or pour out the liquid. You must recombine it first.
What is Homogenizing?
It sounds like a fancy science word, but “homogenizing” just means “mixing until it’s all one smooth consistency.” You need to take that thick, hard cream and that thin, watery milk and blend them back together until they are perfectly smooth, like heavy cream or whole milk.
If you skip this step, your measurements will be wrong. You’ll either get too much fat (a greasy cake) or too much water (a soggy, dense cake).
How to Do It Right (Blender vs. Whisk)
You have a few options to get your coconut milk perfectly smooth.
- The Easiest Way (Blender/Food Processor): The absolute best way to do this is to dump the entire contents of the can (the solid fat and the liquid) into a blender or food processor. A few pulses for 15-20 seconds is all it takes. It will become perfectly smooth, creamy, and pourable. A stand mixer with the whisk attachment also works great.
- The By-Hand Way (Vigorous Whisking): If you don’t want to dirty a blender, you can do this by hand, but you need to use some muscle. Pour the can’s contents into a bowl. Use a whisk to break up the solid cream, mashing it against the side of the bowl. Then, whisk… and whisk… and whisk. Keep going! It might take a minute or two, but it will eventually come together. Just make sure no lumps of the hard cream are left.
Trust me: this one simple step is the key to a perfect Coconut Milk Snack Cake every time.
Gathering Your Supplies: The Full Recipe
Before you start, let’s get everything you need in one place. This is called mise en place (a French term for “everything in its place”), and it makes the whole baking process smooth and stress-free.
Your Ingredient Checklist
Here’s exactly what you’ll need to make one 8×8-inch cake.
| Ingredient | Amount | Notes |
|---|---|---|
| Unsweetened Coconut Milk | 1 cup | Canned, full-fat. Must be blended smooth! |
| Coconut Oil | ¼ cup | Melted and slightly cooled. |
| Large Eggs | 2 | Room temperature is best, if you can. |
| Granulated Sugar | 1 cup | Plain white sugar. |
| Vanilla Extract | ½ tablespoon | Use pure vanilla, not imitation, for best flavor. |
| All-Purpose Flour | 1 ¼ cup | Just regular, plain flour. |
| Unsweetened Coconut | ½ cup | Shredded or flaked. Unsweetened is key! |
| Baking Powder | ¾ teaspoon | This gives the cake its lift. Make sure it’s not expired! |
| Confectioners’ Sugar | 2 tablespoons | Also called powdered sugar. This is optional, for dusting. |
Baker’s Notes on Key Ingredients
A quick word on why these specific ingredients are important.
Coconut Oil: The Secret to a Moist Crumb
This recipe uses melted coconut oil instead of butter. Why? Coconut oil is a pure fat, and it adds another layer of subtle coconut flavor that pairs perfectly with the milk. It also helps keep the cake extra moist, even days after baking. You can use refined (no coconut flavor) or unrefined (more coconut flavor). I prefer unrefined here!
Shredded Coconut: Sweetened vs. Unsweetened?
The recipe specifically calls for unsweetened shredded coconut. This is important because the cake already has a full cup of sugar, which is the perfect amount of sweetness.
Using sweetened coconut (the kind that’s sticky and very sweet) will make your final cake overly sweet and can also change the texture. Unsweetened coconut flakes give you pure, toasty coconut flavor and a lovely, chewy texture without all the extra sugar.
Your Step-by-Step Baking Adventure
Alright, you’ve got your ingredients. Your coconut milk is blended and smooth. Let’s do this.
Step 1: Prep Your Oven and Pan
First things first: Preheat your oven to 375° F (190° C). This is a crucial step! If your oven isn’t fully hot when the cake goes in, it won’t rise properly.
Next, prepare your pan. Get an 8×8-inch baking pan. A glass, ceramic, or metal pan will work just fine. Grease it thoroughly with cooking spray. You want to get the bottom and all four sides, right up to the corners. If you don’t grease it well, your cake will stick.
- Pro-Tip for Gifting: If you’re making this cake to ship to someone (what a great gift!), the prompt has a brilliant idea: use a disposable foil pan. That way, you don’t have to worry about getting your good pan back.
Step 2: Create the Wet Foundation
In a large bowl, it’s time to combine all your “wet” ingredients. This is the flavor base of your cake. Add the following to the bowl:
- Your 1 cup of perfectly blended, homogenized coconut milk
- Your ¼ cup of melted (and slightly cooled) coconut oil
- Your 2 large eggs
- Your 1 cup of granulated sugar
- Your ½ tablespoon of vanilla extract
Stir these together well with a whisk or a spatula until everything is combined. The sugar will start to dissolve, and the mixture should look smooth and pale.
Step 3: Whisk the Dry Ingredients
In a separate, medium-sized bowl, add your “dry” ingredients:
- Your 1 ¼ cup of all-purpose flour
- Your ½ cup of unsweetened shredded coconut
- Your ¾ teaspoon of baking powder
Whisk these together for about 30 seconds. Why this extra step? You want to make sure the baking powder and shredded coconut are evenly spread throughout the flour. If you don’t, you might get a bite of cake with a bitter clump of baking powder (yuck!) or a corner with no coconut at all. This simple whisking step guarantees a perfect cake.
Step 4: The Mix! (Don’t Overdo It)
Now, it’s time to bring it all together. Pour your dry ingredient mixture from the medium bowl into the large bowl of wet ingredients.
Using a spatula (not a whisk!), gently fold and mix the ingredients. You want to mix until just combined. This is the most important rule of quick cakes!
What does “just combined” mean? It means you mix only until you no longer see big streaks of dry flour. A few small lumps are totally fine. If you mix and mix and mix until the batter is perfectly smooth, you will have an awful, tough, rubbery cake.
- The Science: Mixing flour with liquid activates gluten. A little gluten gives the cake structure. Too much gluten (from overmixing) makes it tough and dense instead of light and fluffy. So, be gentle!
Step 5: Bake to Golden Perfection
Pour your lovely, lumpy batter into your prepared 8×8 pan. Use your spatula to spread it evenly into the corners.
Place the pan on the center rack of your preheated 375° F oven. Set a timer for 30 minutes.
After 30 minutes, check the cake. You’re looking for two things:
- Color: The top should be a beautiful, deep golden brown.
- The Toothpick Test: Insert a wooden toothpick (or a cake tester) into the very center of the cake. Pull it out.
- If it comes out with wet, goopy batter, it needs more time. Put it back in for 5-minute increments.
- If it comes out with a few moist, sticky crumbs, it is perfect.
- If it comes out totally clean and dry, it’s probably a tiny bit overbaked (but will still be delicious!).
This cake usually takes between 30 and 40 minutes, depending on your oven and your pan.
Step 6: The Hardest Part… The Cooling
This is, without a doubt, the most difficult step. You have to wait.
Remove the cake from the oven and place the entire pan on a wire cooling rack. Now, walk away. Don’t touch it. You must let it cool completely in the pan.
Why? A hot cake is still “setting.” The crumb is fragile and delicate. If you try to cut it while it’s warm, it will crumble and fall apart. As it cools, the structure firms up, making it possible to get those nice, clean squares. This will take at least an hour, maybe two. Be patient!
Once it’s completely cool (you can touch the bottom of the pan, and it feels like room temperature), you can dust it with the optional powdered sugar. It adds a final touch of sweetness and looks beautiful.
Customizing Your Cake: Fun Variations and Add-Ins
This simple snack cake is a perfect blank canvas. Once you’ve mastered the basic recipe, you can have fun and experiment! Just fold any of these in with your dry ingredients.
Add a Burst of Citrus
Coconut and lime are a match made in heaven.
- Lime Zest: Add the zest of one or two limes to your wet ingredients. It adds an incredible, fresh “pop” of flavor that cuts through the richness.
- Lemon or Orange Zest: Both work beautifully, too!
Go Nuts!
Want a little crunch? Nuts are a great addition.
- Toasted Pecans or Walnuts: Roughly chop ½ cup of toasted pecans or walnuts and fold them in. The toasty, nutty flavor is amazing with coconut.
- Sliced Almonds: These are also a great choice.
Chocolate Makes Everything Better
You can’t go wrong with chocolate.
- Mini Chocolate Chips: Add ½ to ¾ cup of mini chocolate chips. I recommend mini chips because they are lighter and less likely to sink to the bottom of the cake.
- White Chocolate Chips: These pair exceptionally well with the coconut flavor.
How About a Glaze?
If you want to make the cake a little more decadent than just powdered sugar, a simple glaze is the way to go. Whisk these ingredients together and drizzle over the cooled cake.
| Glaze Type | Ingredients | Instructions |
|---|---|---|
| Simple Vanilla Glaze | 1 cup powdered sugar + 1-2 tbsp milk or coconut milk + ½ tsp vanilla | Whisk until smooth. Add more milk if too thick. |
| Zingy Lime Glaze | 1 cup powdered sugar + 2 tbsp fresh lime juice + 1 tsp lime zest | Whisk until smooth. This is the best pairing! |
| Chocolate Drizzle | ½ cup chocolate chips + 1 tsp coconut oil | Microwave in 20-second bursts, stirring in between, until melted and smooth. |
How to Serve Your Coconut Milk Snack Cake
The beauty of this cake is that it needs nothing. You can slice it into 9 or 12 squares and eat it straight from the pan with your hands.
But, if you want to dress it up, it’s easy to do!
- With a Drink: It’s perfect with a hot cup of coffee, a strong black tea, or a cold glass of milk.
- With Toppings: Serve a square warm (reheat in the microwave for 15 seconds) with a scoop of vanilla bean or pineapple ice cream.
- With Fruit: A side of fresh mango, pineapple, or a handful of raspberries cuts the richness perfectly.
Storing, Freezing, and Gifting Your Cake
One of the best things about this cake is how well it lasts. That coconut milk and oil keep it moist for days!
Keeping it Fresh at Room Temperature
Once cooled, you can either cover the pan tightly with plastic wrap or foil, or you can cut the cake into squares and store them in an airtight container. It will stay fresh, moist, and delicious at room temperature for up to one week. (Though it will probably be eaten long before then!)
Freezing for Later
This cake freezes like a dream.
- Cut: Cut the cooled cake into individual squares.
- Wrap: Wrap each square tightly in plastic wrap.
- Store: Place the wrapped squares in a freezer-safe zip-top bag or container.
- Freeze: It will keep in the freezer for up to 3 months.
- Thaw: To eat, just pull out a square and let it thaw on the counter for about 30-60 minutes. It’ll taste as good as new.
The Ultimate Care Package: How to Ship This Cake
As mentioned in the recipe, this is a fantastic cake for shipping to a college student, a friend far away, or a soldier overseas.
- Use a Foil Pan: Bake the cake in a disposable 8×8 foil pan with a lid.
- Cool Completely: Let it cool 100% in the pan.
- DO NOT CUT IT! Leave the cake whole. It travels much better as a single block.
- Wrap the Pan: Place the lid on the pan. Then, wrap the entire pan (lid and all) in two layers of plastic wrap, making it as airtight as possible.
- Box It: Place the wrapped pan in a sturdy shipping box. Add packing material (like bubble wrap or crumpled paper) all around it so it can’t slide around.
- Ship It: Send it on its way! Because it stays fresh for a week, it will easily survive the trip. Learn more about shipping baked goods from a reliable source like King Arthur Baking.
Troubleshooting: When Baking Goes Sideways
Even simple cakes can have off days. Here’s what might have happened.
“My cake is dry!”
This is almost always one of two things:
- Overbaked: You left it in the oven for too long. The toothpick test is your best friend! Remember, a few moist crumbs are perfect.
- Mis-measured Flour: You might have packed your flour into the measuring cup. The best way to measure flour is to fluff it up in the container, gently spoon it into your cup, and level it off with a knife.
“My cake is dense or rubbery!”
This is the classic sign of overmixing. You mixed it too much after adding the flour, which developed too much gluten. Remember, just until the flour disappears! It could also be that your baking powder was old and didn’t give the cake its proper “lift.”
“Why did all my coconut sink?”
If all your shredded coconut is in a layer at the bottom, your batter might have been a little thin. This can happen if your coconut milk wasn’t properly homogenized, and you got too much of the thin liquid.
Coconut Milk Snack Cake FAQs (Frequently Asked Questions)
1. Can I use light coconut milk? I strongly recommend against it. The recipe relies on the high fat content of full-fat coconut milk for its moisture and texture. Light coconut milk will result in a less rich and drier cake.
2. Can I use the coconut milk from a carton (the refrigerated drink)? No, absolutely not. That product is mostly water and is a completely different ingredient. It will not work. You must use full-fat canned coconut milk.
3. My can of coconut milk was totally solid. Is it bad? Nope, it’s perfectly fine! That just means it was stored somewhere cold. In fact, it’s a good sign you got a high-fat brand. Just follow the instructions to blend it—you may need to gently warm it in a saucepan for a minute or pop the whole can (opened!) in a bowl of hot water to soften it before blending.
4. Can I make this gluten-free? Yes! This cake works very well with a good quality 1-to-1 gluten-free baking blend. Just substitute the all-purpose flour with the same amount of your favorite GF blend (one that contains xanthan gum).
5. Can I bake this in a different pan? You sure can.
- Muffins: Pour into a greased 12-cup muffin tin. Bake at 375° F for 18-22 minutes.
- 9-inch Round Pan: A 9-inch round pan will also work. The cake will be a bit thinner, so start checking for doneness around 25-30 minutes.
6. Why is it called a “snack cake”? A snack cake is a simple, one-layer cake, usually baked in a square or rectangular pan. It doesn’t have fussy frosting (or any frosting at all) and is considered informal enough to be eaten as a snack, any time of day.
Your Next Baking Project Awaits
This Coconut Milk Snack Cake is more than just a recipe. It’s a solution. It’s the answer to that craving for something sweet, simple, and satisfying. It’s a reliable, delicious, and incredibly forgiving cake that will make your whole house smell like a tropical dream.
So what are you waiting for? That can of coconut milk in your pantry is calling your name.
Pull out your bowls, preheat your oven, and give yourself this simple, wonderful gift. You deserve a little snack. When you bake it, be sure to come back and leave a comment. Let us know if you added any fun variations!
Happy baking!
Coconut Milk Snack Cake
Ingredients
Equipment
Method
- Preheat oven to 375°F. Grease an 8×8 inch pan with cooking spray.
- Homogenize Coconut Milk: Open the can of coconut milk and thoroughly combine the contents (the heavy fat must be blended with the liquid). Use a blender, food processor, or stand mixer until the consistency is similar to cream.
- Combine Wet Ingredients: In a large bowl, stir together the homogenized coconut milk, melted coconut oil, eggs, granulated sugar, and vanilla extract.
- Combine Dry Ingredients: In a medium bowl, whisk together the flour, shredded coconut, and baking powder.
- Finish Batter: Add the dry ingredients to the wet ingredients. Mix until just combined (do not overmix).
- Bake: Pour the batter into the prepared pan and bake for 30-40 minutes until the top is golden brown and a toothpick inserted in the center comes out clean.
- Cool: Remove the cake from the oven and allow it to cool completely in the pan on a wire rack.
- Finish: When cooled, the top of the cake can be sprinkled with powdered sugar (optional).
- Store: Wrapped well or stored in an airtight container at room temperature, the cake remains fresh for up to 1 week.